Meta-friendly intro
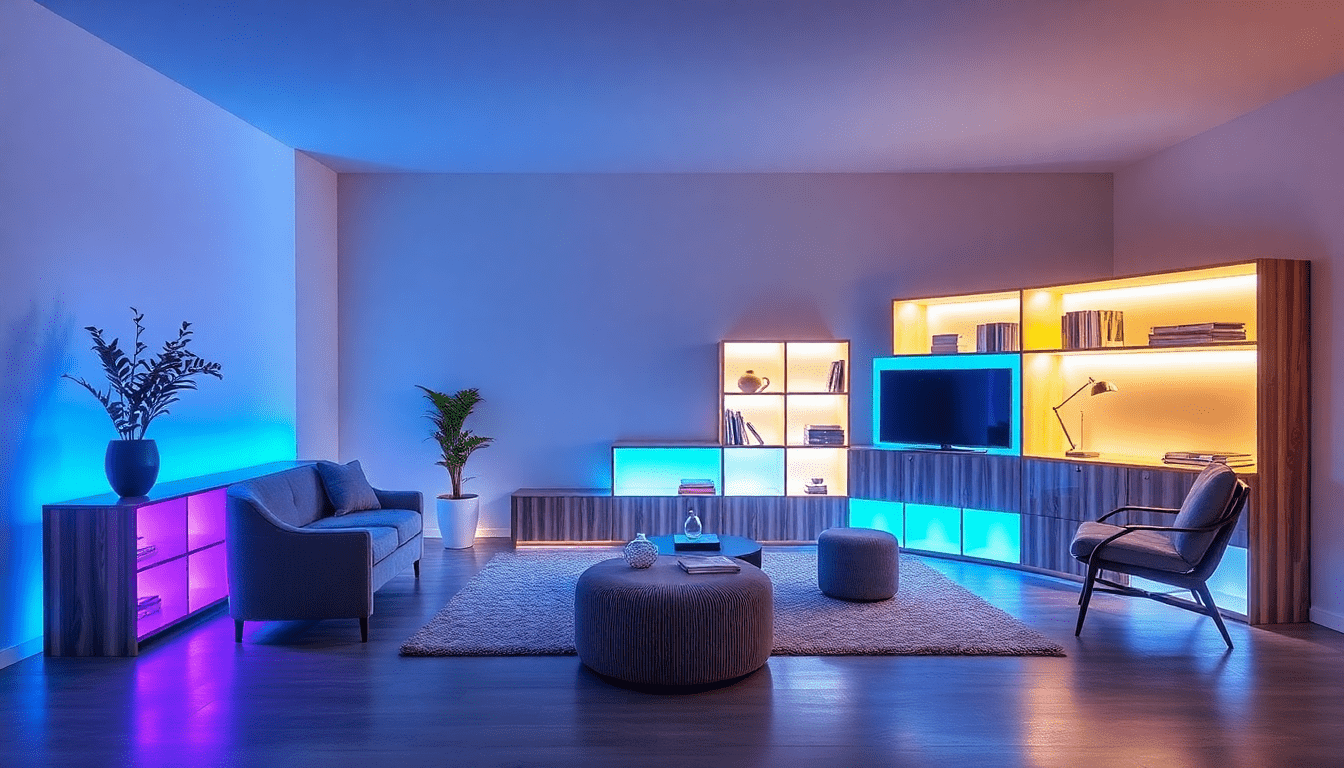
Sensor‑tuned ambient lighting that dissolves furniture edges into architecture, making small apartments feel larger, cohesive, and adaptive.
Introduction
Edgeless integration is a design and technology approach that uses continuous, sensor‑driven ambient lighting to visually fuse modular furniture with architectural planes. In tight living spaces, this strategy reduces perceived clutter, enhances flow, and supports multifunctional living—without major structural renovations. This long-form guide covers why it works, how to design and implement it, technical specs, case studies, budgets, and troubleshooting tips for designers and motivated DIYers.
Why Edgeless Integration Matters for Small Apartments
Small apartments often suffer from fragmented surfaces and visual interruptions caused by freestanding furniture, open shelving, and compact zones used for many functions. Edgeless integration addresses these challenges by:
- Creating visual continuity so separations between furniture and walls feel seamless.
- Expanding perceived space by extending architectural lines with continuous light.
- Supporting multifunctional layouts where furniture needs to recede or stand out depending on use.
- Improving usability through sensor automation—lighting adapts to presence, time of day, and ambient conditions.
Core Concepts: How Sensor‑Tuned Ambient Lighting Works
- Continuous illumination: Using linear LED sources and diffusers to create unbroken lines or soft glows that bridge furniture and building surfaces.
- Sensors and feedback: Ambient-light sensors, motion/proximity sensors, and presence detectors dynamically adjust brightness and color temperature.
- Controls: Smart drivers and controllers manage dimming curves, scenes, and adaptive behavior through home automation protocols.
- Perceptual blending: By grazing surfaces, washing edges, or adding under‑furniture glow, light reduces edge contrast and visually merges components.
SEO Keywords to Target
- edgeless integration
- sensor tuned ambient lighting
- modular furniture lighting
- small apartment lighting ideas
- smart lighting for apartments
- ambient lighting design
- multifunctional furniture lighting
Design Strategies: Where to Place Light to Blur Edges
Edgeless lighting relies on careful placement to trick the eye. Use these strategies to connect furniture and architecture visually:
- Continuous cove runs: Extend ceiling coves into shelving units and headboards so light appears to run uninterrupted across planes.
- Edge-wash profiles: Micro linear fixtures mounted at furniture edges that wash light onto adjacent walls soften edge contrast.
- Under-furniture ambient glow: Concealed LEDs beneath floating cabinets, benches, and sofas visually lift pieces and obscure the furniture-to-floor seam.
- Integrated backlighting: Backlit panels behind shelving or modular partitions make furniture recede into the wall rather than protrude from it.
- Toe-kick continuity: Continuous toe-kick lighting in kitchens and storage runs visually lengthens the room and anchors cabinetry to architecture.
Technical Deep Dive: Components and Specs
Choosing the right components is essential for a convincing edgeless effect. Key considerations include light source, diffusion, color, control, and thermal design.
LED Sources
- Type: Flexible LED strips, micro linear LED modules, or slim rigid channels depending on run length and profile.
- CRI: Aim for CRI 90+ to maintain accurate surface color and material rendering.
- Tunable white vs RGBW: Tunable white (2700–5000K) offers the most practical daylight and evening transitions; RGBW adds accent color but increases complexity.
- Lumen density: For edgeless ambient runs, design for 100–300 lumens per meter after diffusion—adjust for distance to the wall and intended brightness.
Diffusion & Fixtures
- Diffusers: Frosted/opal diffusers produce uniform glow and hide LED point sources.
- Profiles: Aluminum channels for heat dissipation and rigid mounting; low-profile surface channels for tight clearances.
- Beam control: Use narrow troughs and grazing angles for edge-wash; larger coves work for broad indirect glows.
Sensors & Control
- Ambient light sensors: Calibrate scene thresholds so the system dims as daylight rises to avoid overlighting.
- Motion/proximity sensors: Passive infrared (PIR) for coarse motion; radar or ultrasonic sensors for low-motion occupancy detection.
- Controllers & protocols: Use Zigbee, Z-Wave, Bluetooth Mesh, or Wi‑Fi devices compatible with Home Assistant, Hubitat, or commercial hubs.
- Drivers: Remote constant-voltage drivers reduce voltage drop; distribute power injections for long continuous runs.
Material & Finish Considerations
The interaction between light and surface materials affects how seamlessly furniture integrates with architecture:
- Matte finishes: Absorb and diffuse light softly—ideal for edgeless blending.
- Low-sheen paints: Reduce glare while providing gentle light reflection.
- Reflective accents: Use sparingly to extend light further but avoid specular highlights that reveal seams.
Practical Implementation: Planning and Workflow
A structured approach ensures functional outcomes and simplifies installation:
- Survey and mapping: Photograph and measure architectural lines, furniture modularity, electrical access points, and natural light sources.
- Concept mockups: Use sketches or 3D models to map continuous light runs and sensor locations.
- Component selection: Choose LEDs, channels, drivers, sensors and control platforms aligned with budget and performance targets.
- Power and wiring plan: Determine driver placement, power injection points, and cable routing to avoid voltage drop and visible outlets.
- Installation sequence: Install channels and diffusers before furniture finishes where possible; wire drivers and sensors to accessible service zones.
- Calibration: Program scenes, thresholds, and automation—test across morning, midday, and evening light conditions.
Step-by-Step DIY Guide: Edgeless Cove to Modular Shelf Run
Example project: Connect a ceiling cove to a modular bookshelf with a continuous concealed light run.
- Tools & materials: LED strip (24V), aluminum channels with opal diffuser, 24V constant-voltage driver, ambient light sensor, motion sensor, wire, connectors, mounting hardware, multimeter.
- Step 1 — Measure & plan: Map the cove path and bookshelf junction. Determine channel lengths and where to place the driver (preferably in a utility closet or ceiling void).
- Step 2 — Install channels: Mount aluminum channels into the cove and along the bookshelf edge. Use mitred corners or flexible connectors for continuous runs.
- Step 3 — Wire power: Run 24V cable from the driver to injection points near the middle of long runs to limit voltage drop. Secure connections with solder or reliable connectors.
- Step 4 — Mount LED strips: Peel, stick, and fasten LED strips into channels. Adhere cleanly and avoid sharp bends; leave spacing for power feeds.
- Step 5 — Attach diffusers: Snap opal diffusers into channels to hide LED points and create uniform glow.
- Step 6 — Install sensors: Place ambient sensor where it reads room light, not the direct cove beam. Install motion sensor to sense approach paths, not directly above the furniture to avoid false triggers.
- Step 7 — Program: Use the controller to set scenes and sensor thresholds. Test and tweak lux and motion sensitivity across time of day.
- Step 8 — Final trim & calibration: Patch any visible seams, confirm thermal runs, and schedule a follow-up calibration after several days of use.
Calibration & Tuning: Creating Natural Transitions
Fine-tuning is what makes the edgeless effect feel effortless rather than theatrical. Key practices:
- Measure lux levels on adjacent surfaces and set ambient thresholds so wall-wash and furniture glow remain slightly lower than primary task lighting.
- Set dimming ramp times (0.5–2 seconds) for motion activation to avoid harsh jumps; use longer fades for scene transitions (2–8 seconds).
- Implement circadian tuning: Cooler (4000K–5000K) during daytime and warmer (2700K–3000K) in evening scenes to support comfort and sleep cycles.
- Use adaptive algorithms: Some controllers can learn patterns and adjust sensitivity to reduce false triggers in high-traffic areas.
Automation & Smart Home Integration
Tight integration with home automation improves convenience and energy efficiency while enhancing the edgeless illusion:
- Scene orchestration: Coordinate edgeless lighting with window shades, HVAC, and audio to match activity (work, cooking, entertaining).
- Time & presence awareness: Use geofencing or occupation schedules to switch modes automatically (e.g., daytime work vs evening relax).
- Voice control: Offer simple commands for rapid changes, while still preserving sensor automation for passive operation.
- Interoperability: Prefer standards-friendly platforms (Matter-ready or widely compatible hubs) to avoid vendor lock-in and broaden future upgrade paths.
Styling Tips: Making Edgeless Lighting Feel Intentional
- Maintain material consistency: Align diffuser finishes and trim with furniture edges so the joint feels designed, not patched.
- Layering: Use edgeless ambient light as a soft base layer, then add task and accent lights for functionality and depth.
- Color accents: Reserve saturated color for occasional accents—too much color undermines the subtle edgeless effect.
- Scale carefully: Keep runs proportional to the furniture; overlong or overbright strips break the seamless illusion.
Real-World Case Studies
Three detailed scenarios showing practical outcomes, constraints, and results.
Case Study 1: Micro-Studio with Fold-Down Bed
- Goal: Make the Murphy bed visually recede when stowed and provide warm, low-glare light for evening use.
- Solution: Ceiling cove extended into the bed panel with tunable white LED and radar presence sensors for low-motion detection. Under-bed toe-kick glow added to lift the bed visually.
- Outcome: The bed panel appears as a continuation of the wall; motion-based dimming prevents sudden brightening in the sleeping area.
Case Study 2: Convertible Living/Work Area
- Goal: Provide crisp task lighting during daytime work sessions and warm ambient light for evening relaxation without reconfiguring furniture.
- Solution: Modular shelving with under-shelf edgeless runs and tunable white control tied to the homeowner's calendar and motion sensors.
- Outcome: The shelving blends with the wall during off-hours; work scenes raise color temperature and intensity when a laptop is detected at the desk.
Case Study 3: Compact Kitchen-Living Run
- Goal: Visually lengthen a narrow open-plan kitchen and integrate island seating as an architectural element.
- Solution: Continuous toe-kick lighting and recessed ceiling troughs, combined with under-island diffusion that mirrors the ceiling run.
- Outcome: The kitchen reads as a unified volume rather than a collection of cabinets and furniture; the island recedes visually when not in use.
Budgeting & Cost Estimates
Costs depend on scale, component quality, and control complexity. Example ranges (USD):
- Basic DIY kit (LED strips, channels, simple driver, PIR): $150–$400 per run (3–5 meters).
- Mid-range (high-CRI tunable white, diffusers, smart driver, quality sensors): $400–$1,200 per run.
- High-end integrated systems (professional design, custom aluminum extrusions, RGBW, advanced presence sensors, hub integration): $1,200–$4,000+ per run.
Pro tip: Allocate 10–20% contingency for power injection cables, connectors, and finishing materials.
Maintenance, Safety & Longevity
- Heat management: Always mount LEDs to aluminum channels and ensure driver ventilation to prevent color shift and early failure.
- Service access: Design removable panels or service hatches in modular units for driver and sensor access.
- Firmware updates: Keep controllers and smart hubs updated for security and improved feature sets.
- Cleaning: Diffusers collect dust; clean gently with a microfiber cloth and mild detergent as needed.
Troubleshooting Common Issues
- Visible LED dots under diffusers: Use higher density LED strips and thicker/opal diffusers to smooth the glow.
- Color shift over time: Check driver compatibility and proper thermal mounting; replace aging strips if CRI or color drifts.
- False motion triggers: Reposition or replace PIR with radar sensors for low-motion areas.
- Voltage drop/dimming at end of run: Add power injection points or switch to higher-voltage architecture (e.g., 24V with mid-run feeds).
Sustainability & Energy Efficiency
- LED efficiency: Modern LEDs provide high lumens-per-watt; choose efficient drivers and dim deeply when possible.
- Sensor-driven operation: Automated dimming and shutoff reduces runtime and energy use compared to static lighting.
- Materials: Use recyclable aluminum channels and long-life drivers to minimize replacement cycles.
- Lifecycle planning: Select components with good manufacturer warranties and modular replaceability to reduce waste.
Future Trends: What to Expect in Edgeless Lighting
- Smarter sensors with machine learning that adapt to occupant behavior and predict preferred scenes.
- Higher-density micro-LEDs enabling thinner, more uniform edgeless runs.
- Matter and other interoperability standards simplifying integration across brands and platforms.
- Materials innovation—translucent engineered panels that integrate lighting directly into furniture skins for truly monolithic surfaces.
FAQ: Quick Answers to Common Questions
- Q: Can edgeless lighting be retrofitted? A: Yes—many runs are surface-mountable with low-profile channels, but plan for wiring and driver placement.
- Q: Will continuous light runs increase my energy bill? A: Sensor tuning and low-wattage LEDs keep energy use modest; automation often reduces overall lighting energy compared to unmanaged fixtures.
- Q: Is RGB necessary? A: Not for edgeless integration; tunable white often provides the most natural and useful results.
- Q: How durable are strips in kitchens/bathrooms? A: Choose IP-rated components and follow local electrical codes for wet environments.
Checklist for Designers & Homeowners
- Map the architectural lines and decide where light will bridge gaps.
- Select high-CRI, tunable white LED systems with appropriate diffusers.
- Plan power injections and driver locations to prevent voltage drop.
- Position sensors for accurate readings and minimal false triggers.
- Program scenes for daily rhythms and test over several lighting conditions.
- Design for serviceability and thermal management to maximize lifespan.
Conclusion
Edgeless integration—sensor‑tuned ambient lighting that visually fuses modular furniture with architecture—is a powerful strategy for maximizing spatial perception, flexibility, and aesthetic cohesion in small apartments. When thoughtfully specified and calibrated, it transforms functional furniture into architectural continuations, creating calm, adaptable living environments. Whether you are a designer looking to offer clients a high-end spatial trick or a DIYer aiming to modernize your micro-apartment, the principles outlined here will help you plan, implement, and maintain effective edgeless lighting solutions.
Visit XENTAR for more lighting, decor & furniture curated for modern homes and creative spaces.


Share:
Grounding Glow: How Concealed Smart Lighting Makes Modular Furniture Feel Built-In in Tiny Apartments
Finish‑Matched Illumination: Smart Lighting Techniques to Seamlessly Integrate Modular Furniture into Small Apartments