Finish‑Matched Illumination: Smart Lighting Techniques to Seamlessly Integrate Modular Furniture into Small Apartments
Intro: why this approach matters (meta‑friendly intro)
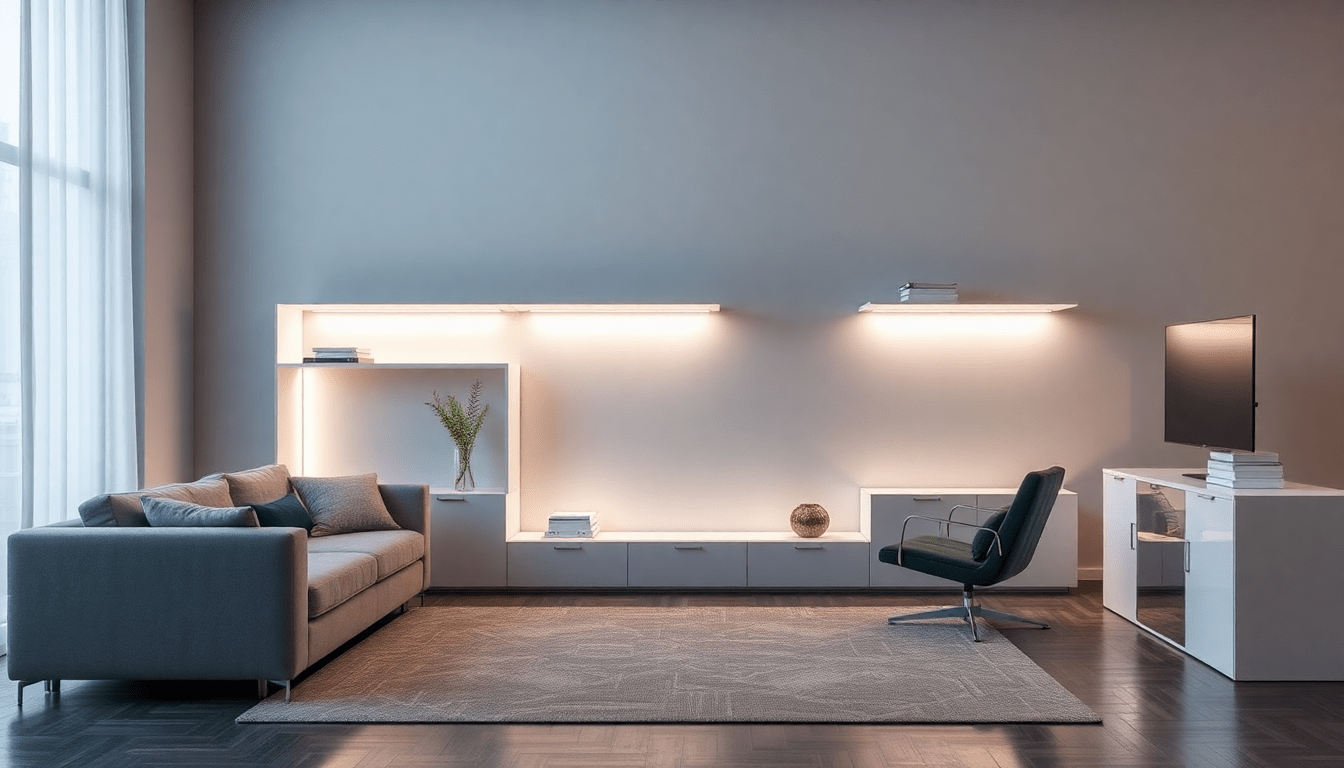
Finish‑matched illumination harmonizes light quality, fixture finish and modular furniture to make compact apartments feel larger, more functional and curated.
Why finish‑matched illumination transforms small apartments
In small apartments, every surface and light source influences perception of space. Finish‑matched illumination is a design approach that aligns light color, intensity and fixture finishes with your modular furniture palette — creating visual continuity, minimizing clutter, and enhancing the multipurpose nature of modular systems. The result is a home that reads as a single, intentional composition rather than a collection of pieces.
What you gain with finish‑matched lighting
- Perceived space increase through depth and layered light
- Better visual comfort and accurate color rendition (high CRI)
- Cleaner aesthetics by hiding wiring and matching hardware finishes
- Improved functionality for work, cooking, rest and storage zones
- Greater flexibility via smart controls and tunable white lighting
Core lighting principles — technical and design fundamentals
- Layered lighting: Combine ambient (general), task (work), accent (feature) and decorative lighting for flexible scenes.
- Color temperature (CCT): Match the finishing palette: 2700–3000K for warm woods and brass; 3000–3500K for lighter woods and neutral schemes; tunable white for multiuse spaces.
- Color rendering (CRI): Use CRI ≥90 for accurate finishes and fabrics; consider R9 values for saturated reds in textiles and leather.
- Lux targets: Typical targets: ambient 100–200 lx for living areas, task 300–500 lx for worktops/desks, accent 150–300 lx to highlight features.
- Beam angles & scale: Narrow beams (15°–30°) for accenting, medium (30°–60°) for general, wide (>60°) for soft ambient fill.
- Finish continuity: Echo furniture hardware in fixture trims—matte black for contrast, brushed nickel for neutrality, warm brass for vintage or warm palettes.
Smart lighting techniques that integrate with modular furniture
- Integrated LED profiles (channels): Aluminum channels with diffusers installed beneath shelves, inside open modules or along the bottom lips of cabinetry create continuous, shadow‑free illumination that visually ties units together.
- Edge and backlighting: Backlighting behind panels, TV units or floating shelves adds perceived depth, lifting modular walls off the background and creating separation in open plans.
- Under‑shelf and under‑cabinet task lights: Slim, high‑CRI strips provide focused light for kitchenettes, desks and reading nooks without taking floor space.
- In‑furniture lighting: Motion‑activated drawer and wardrobe lights, internal shelf LEDs, and illuminated cubbies increase usability and highlight accessories.
- Accent fixtures integrated into hardware: Use small integrated uplights in shelving uprights or picture lights mounted to modular tops to create vertical light lines.
- Portable smart lighting: Magnetic puck lights, battery LED strips and USB‑rechargeable fixtures are ideal for modular pieces that move frequently.
- Tunable white and RGBW strategies: Tunable white for matching finishes throughout the day; RGBW accents for seasonal refreshes and mood without changing furniture.
- Concealed wiring with quick disconnects: Push‑fit connectors, magnetic cable couplers and keyed plugs let you reconfigure modules without new wiring each time.
How to match lighting finishes and tones to common modular materials
Matching light to finish means choosing the right CCT, beam control and fixture finish to support the material’s visual characteristics.
- Dark walnut or espresso woods: Use warm CCT (2700–3000K) to enhance richness; employ diffused fixtures to avoid specular glare on varnished surfaces.
- Light oak, birch, bleached woods: Slightly cooler neutrals (3000–3500K) maintain crispness while avoiding a clinical look.
- Matte painted MDF (white or color): Neutral 3000K and high CRI keep hues true; place accent light to reveal texture.
- Laminate and melamine: Use diffusers and lower beam intensity to reduce reflective hotspots; match metal trims in fixtures to cabinet handles.
- Metal finishes: Coordinate fixture trims with hardware—black fixtures for industrial looks, warm brass for mid‑century modern, and brushed nickel for contemporary minimalism.
- Textiles and upholstery: Use higher CRI and adjustable intensity to reveal true textile color and texture, especially for sofas and cushions that anchor the space.
Practical installation tips for modular systems — power, placement and wiring
- Plan power nodes: Map outlet and driver locations to modular anchor points before final assembly; 24V runs reduce voltage drop on longer strips.
- Voltage drop basics: For 12V LED strips expect visible voltage drop beyond 4–5 meters; use 24V strips or inject power at multiple points for runs over 5 meters.
- Constant voltage vs constant current: Interior LED strips usually use constant voltage (12V/24V). For high‑power linear fixtures, constant current drivers may be required — consult product specs.
- Conceal wiring in channels: Use the back cavities of modular panels, routed channels, or slim adhesive raceways to hide cables and keep plug/reconnector access points.
- Quick connectors & modular plugs: Use push‑fit, JST, or magnet connectors for repeatable module swaps; label connections to avoid confusion during reconfigurations.
- Mounting and adhesives: Use aluminum channels with mounting clips for clean lines; high‑tack double‑sided tape works for short, low‑temperature strips, but mechanical fastening is better for long term.
- IP rating for wet zones: Use IP44+ rated fixtures in kitchenette backsplashes or near sinks; consider fully waterproof IP65/68 strips for exposed areas.
- Driver ventilation: Allow airflow around drivers; do not bury drivers inside fully enclosed, heat‑trapping modules.
- Hire when needed: Engage a licensed electrician for mains wiring, hardwired fixtures, or where local code requires it.
Smart control platforms and compatibility (2025‑ready)
Choose control systems that balance ease of use, interoperability and future compatibility. In 2025, Matter, Thread and Bluetooth Mesh have improved cross‑platform reliability; Zigbee and Z‑Wave remain strong in pro ecosystems. Wi‑Fi devices are convenient but can congest home networks.
- Matter & Thread: Best for future compatibility — look for tunable drivers and bulbs with Matter certification to ensure cross‑vendor scenes.
- Zigbee / Z‑Wave: Excellent for established smart hubs (Home Assistant, SmartThings, Hubitat) and low‑latency mesh networks.
- Bluetooth Mesh: Simple, local control for lights and strips without cloud dependence; good for smaller installs.
- Wi‑Fi: Easy setup for single‑vendor ecosystems; prefer devices that support local LAN control to avoid cloud lag and privacy concerns.
- Voice assistants: Alexa, Google Assistant and Siri shortcuts integrate well with smart scenes — but use scenes and automations for predictable daily routines.
Lighting scenes and smart recipes — practical settings you can copy
Below are tested scenes and schedules tailored to modular living. Lux values are targets; adjust based on personal preference.
- Morning Wake (7:00–8:00): Tunable white ramp 2700K -> 3500K over 30 minutes; 200–300 lx ambient at living area; desk at 400 lx. Purpose: gentle wake, prepare for the day.
- Work / Focus (9:00–12:00 and 14:00–17:00): 4000–5000K neutral white; desk 400–600 lx via under‑shelf task LEDs, overhead ambient 300 lx. Purpose: accurate color and reduced eye fatigue.
- Relax / Evening (19:00–22:30): Warm 2700K, ambient 80–150 lx, accent shelf/backlighting at low levels; dim down over 2 hours to ease melatonin production.
- Entertain (19:00–23:00): Warm ambient, accent color washes (RGBW) on shelving, media wall backlight at 100–200 lx; use scenes to coordinate music and lights.
- Night Mode (23:00–6:30): Path lights at 5–20 lx with warm 2200–2700K motion‑triggered strips; main lights off to avoid sleep disruption.
Automation ideas: geofencing to activate entry lights, sunrise/sunset offsets for seasonal tuning, motion sensors for closet and under‑bed lights, and presence detection to reduce energy use.
Product selection guide: specifications to prioritize
- LED type: SMD 2835 or 2216 for a balance of efficiency and cost; 5050 for RGBW color mixing when accents are required.
- CRI: ≥90 (Ra) and R9 > 50 for rich reds in fabrics and leather.
- CCT control: Ensure tunable white (CCT range at least 2700–5000K) with seamless mixing and smooth dimming.
- Lumens per meter: For task lighting aim for 800–1200 lm/m; for ambiance 200–600 lm/m depending on diffusion.
- Voltage: 24V strips are preferable for longer runs; 12V acceptable for short runs and small modules.
- Driver specs: Dimmable (PWM), >85% efficiency, and the correct wattage headroom (add 20% to expected load).
- Channels & diffusers: Use frosted diffusers for even light and to avoid spotting on glossy surfaces.
- Connectivity: Matter/Thread, Zigbee, Bluetooth Mesh, or Wi‑Fi depending on your hub strategy.
Budgeting, timelines, and return on investment
Typical cost ranges and installation times for a small apartment (studio to 1‑bed):
- DIY material cost: $100–$400 for LED strips, aluminum channels, drivers, connectors and basic smart controllers.
- Pro installation: $400–$1,800 depending on hardwiring, driver placements and custom carpentry work.
- Timeline: DIY small install: half‑day to 2 days; pro install: 1–3 days including drywall/trim adjustments.
- ROI: Enhanced perceived value, better photography for listings, improved livability — non‑direct financial returns are high in small apartments where functionality matters.
Sustainability and long‑term maintenance
- Choose replaceable strip modules and modular drivers to minimize waste.
- LEDs with long lumen maintenance (L70 >25,000 hours) reduce replacement frequency.
- Recycle old drivers and fixtures; many local programs accept electronics and lighting components.
- Regularly clean diffusers and check connectors to avoid heat buildup and maintain light quality.
Two extended layout case studies (detailed)
Case Study A — Micro studio (25–30 m²) with wall bed and modular storage:
- Problem: Limited floor space, multiuse sleeping/working/living zones, visible wires from temporary lighting.
- Solution summary: Install integrated 24V LED channels under floating shelf fronts and inside bedside/modular units; backlight the media panel to create depth; add motion LED strip under the wall bed to serve as night path light.
- Components used: 24V high‑CRI LED strip (800 lm/m), aluminum channels with frosted diffuser, 24V 60W dimmable driver, Matter‑compatible tunable controller, magnetic quick‑connects for the wall bed module.
- Outcome: The room reads larger because the media wall floats visually; task light over the fold‑down desk reaches 500 lx; motion‑activated night light reduces reliance on floor lamps.
Case Study B — One‑bed open plan (45–55 m²) with modular kitchenette and office nook:
- Problem: Open plan created visual clutter; kitchen task light insufficient; modular shelving lacked cohesion.
- Solution summary: Use coordinated finish trims (matte black) on linear downlights and shelf channels; under‑cabinet strips in kitchenette (IP44), backlight open shelving in living area with warm 3000K to match oak veneer, and implement zoned Matter scenes for work/relax/entertain.
- Components used: 24V SMD 2835 strips for living backlight, IP65 12V strips behind backsplash, dimmable driver with PWM, Matter‑enabled controller, smart switch for manual override.
- Outcome: Visual coherence via finish continuity; daylight‑mimicking work light improved productivity; curated accent lighting reduced perceived clutter and emphasized focal points.
Shopping checklist — what to buy for a typical finish‑matched install
- 24V high CRI LED strips (with cut points and data sheet)
- Aluminum mounting channels and frosted diffusers
- Dimmable drivers sized with 20% headroom
- Matter/Zigbee/Bluetooth controller depending on hub
- Magnetic/quick connectors & junctions
- Motion sensors, ambient light sensors and smart switches
- Adhesive tapes, mounting clips, and small tools (wire stripper, soldering iron if required)
Common FAQs
- Will LED strips damage wood finishes? Low‑heat LED strips installed with proper diffusers and ventilation are safe; avoid placing high‑power LEDs directly against heat‑sensitive veneers without a thermal gap.
- How do I avoid color mismatch? Use a single driver/channel for tunable white runs that need to match. Buy strips from the same production batch and verify CCT tolerance (±100K).
- Are smart lights reliable? Modern Matter/Thread devices offer robust local control; choose devices with local control as backup to cloud services.
- Can I DIY the wiring? Simple low‑voltage installations can be DIY, but hire a pro for mains wiring, code compliance, or complex junctions.
Quick design checklist before you start
- Document furniture finishes, hardware colors and desired focal points.
- Map power locations and calculate run lengths (use 24V for runs >4–5m).
- Choose CCT and CRI targets and buy test samples before full purchase.
- Create at least three scenes (work, relax, night) and assign switches or automations to each.
- Leave service access to drivers and controllers for maintenance.
Final design principles — a compact summary
- Match light quality to finish: CCT, CRI and intensity matter more than fixture style in small homes.
- Conceal infrastructure: Hidden channels and quick connectors preserve the minimalist look of modular systems.
- Design for flexibility: Use tunable white, portable accents and modular connectors to adapt as furniture reconfigures.
- Prioritize human comfort: Use circadian‑friendly schedules and low‑glare diffusers to support sleep and focus.
Finish‑matched illumination is a practical, high‑impact strategy for making modular furniture feel built‑in and intentional in small apartments. With careful selection of LED types, controllers and finishes — plus smart scenes tuned to daily routines — you can create a compact home that looks larger, functions better and adapts to changing needs.
Visit XENTAR for more lighting, decor & furniture curated for modern homes and creative spaces.


Share:
Edgeless Integration: Sensor‑Tuned Ambient Lighting to Visually Fuse Modular Furniture with Architecture in Small Apartments
Innovative Smart Lighting Strategies to Enhance Modular Furniture Integration in Contemporary Home Designs