Meta-friendly intro
Sensor-driven ambient lighting can visually anchor convertible furniture in small spaces, improving function, flow, comfort, and perceived square footage.
Introduction: why lighting is critical for flexible small spaces
As urban living and micro-apartments become the norm in 2025, designers and homeowners seek ways to make small spaces feel larger, more functional, and intentional. Convertible furniture—sofas that become beds, Murphy beds, folding tables, and modular storage—solves space constraints but often creates visual chaos when deployed. Lighting is the secret design tool that can transform movable furniture into permanent-feeling zones. When combined with sensors and smart automation, ambient lightscapes become responsive anchors that adapt to activity, time, and daylight without manual effort.
What you’ll learn in this guide
- How sensor-driven lightscapes define functional zones for convertible furniture
- Sensor types, placement tips, and integration best practices
- Lighting levels, color temperature strategies, and fixture recommendations
- Automation logic and practical scene examples (day/night/work/guest modes)
- DIY installation, renter-friendly options, and when to call a pro
- Maintenance, energy impact, troubleshooting, and styling tips
Understanding sensor-driven lightscapes
A lightscape is more than a fixture—its an orchestrated set of light layers (ambient, task, accent) controlled to shape mood and function. Sensor-driven lightscapes add intelligence: sensors monitor occupancy, motion, furniture position, and ambient daylight, and automation rules trigger scenes that change brightness, distribution, and color temperature. For convertible furniture, this means lighting reacts to the pieces state (stowed, partially open, extended) and to the activity associated with it (sleeping, dining, working, lounging).
Why anchoring matters: psychological and spatial effects
- Perceived permanence: Consistent lighting behind or around movable furniture makes it read as an intentional focal point.
- Improved function: Task lighting and adaptive scenes reduce friction when switching furniture modes.
- Visual organization: Anchors define zones without adding physical partitions, preserving openness.
- Comfort and wellbeing: Tunable light supports circadian rhythm and activity-based comfort.
Key sensors to include and where to place them
Select sensors based on the action you want to detect. Below are the most useful types for small flexible spaces.
- Contact/position sensors: Attach to hinges or frames on Murphy beds, fold-down desks, and sofas that convert to beds. These trigger scenes directly tied to the furniture state.
- PIR motion sensors: Inexpensive and reliable for detecting entry/exit in a zone. Best near entrances and circulation paths.
- Presence sensors: More sensitive than PIRs, they detect small movements—ideal for workstations where occupants are relatively still.
- Ambient light (lux) sensors: Mounted near windows or on a wall to measure daylight and enable daylight harvesting—dimming interior lights when natural light suffices.
- Accelerometers/tilt sensors: Mounted on folding panels to detect angle changes; useful for triggering intermediate scenes during the transition (e.g., halfway open).
- Pressure sensors: Under cushions or mats to detect presence on a sofa/bed as an added redundancy for occupancy detection.
Placement best practices
- Mount contact/tilt sensors directly on mechanical joints where they wont impede movement—ensure they dont face stress or crushing points.
- Place motion sensors at 2.1m height for balanced coverage; adjust based on ceiling height and furniture arrangement.
- Locate lux sensors where they get a representative sample of daylight but not direct sunlight (which skews readings).
- Test sensor lines-of-sight before permanent installation; furniture movement and reflective surfaces can affect detection.
- Use multiple sensor types for reliability—e.g., contact + PIR—to avoid false positives/negatives.
Lighting design principles for anchoring convertible furniture
Effective anchoring relies on layering light and thoughtful placement. The following principles will help you design cohesive and adaptable lightscapes.
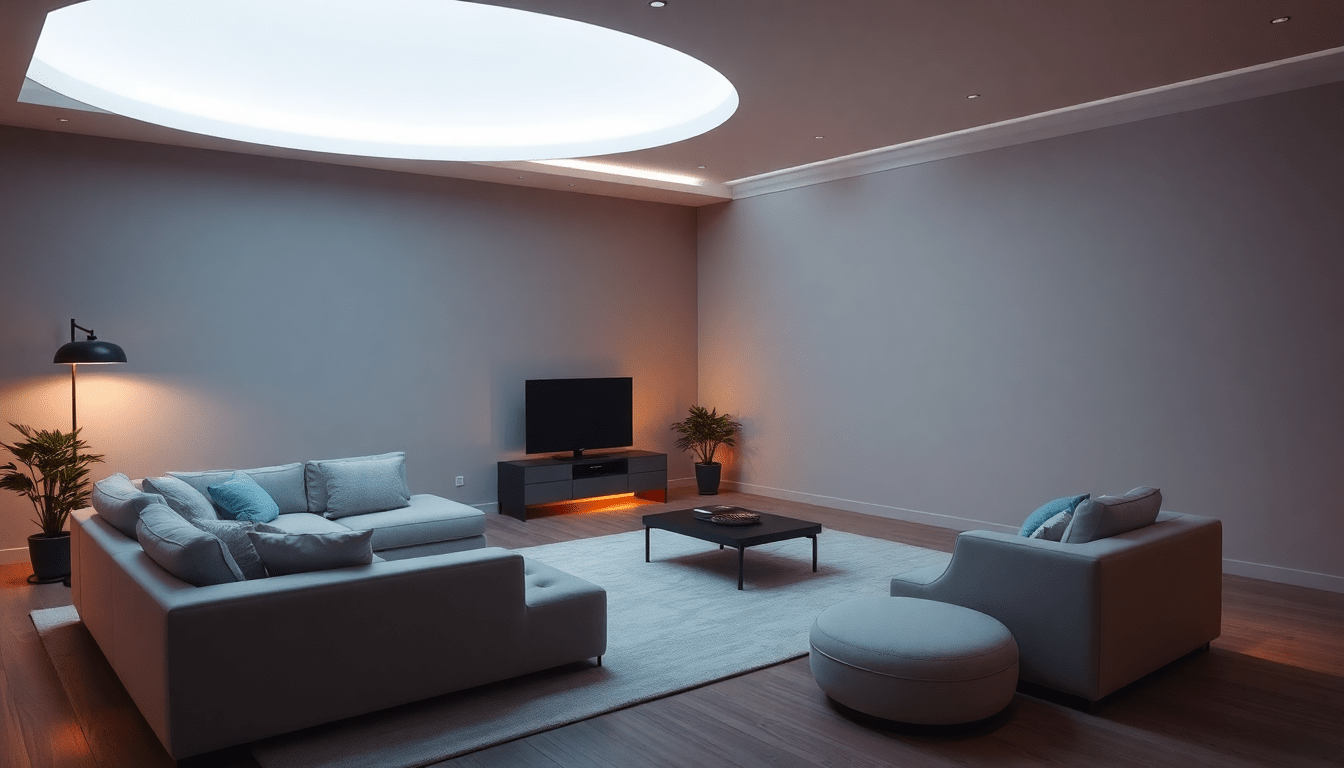
- Create a permanent backdrop: A wall wash, vertical uplight, or backlit panel behind a convertible piece makes it read as a dedicated zone whether the furniture is stored or deployed.
- Use low-level perimeter lighting: LED toe-kicks or cove lighting around a sofa/bed base delineate the footprint without consuming visual space.
- Add targeted task light: Adjustable reading sconces or pendant task lights serve dual purposes for sleeping and working/dining modes.
- Control glare and reflections: Prefer diffused light over bare LEDs; angle fixtures to avoid screen glare on laptops or TVs.
- Support transitions with dimming: Smooth fades (300ms to 2s) feel natural; abrupt on/off undermines the subtle effect of a light anchor.
Color temperature strategy: tuning mood across activities
Color temperature (CCT) is a powerful cue. Use tunable white (CCT adjustable) fixtures to adapt the anchor's mood to activity and time of day.
- 2700KK (Warm): Best for evening lounging and sleep prep; makes compact spaces feel cozy and intimate.
- 3000K (Neutral-warm): Versatile for mixed-use zones where you need a warm but functional feel.
- 3500K-4000K (Neutral to cool): Use during daytime work scenes for visual clarity and alertness.
- Daylight-adaptive cues: Use cooler tones in the morning, neutral midday, and warm downshift toward evening to support circadian comfort.
Recommended light levels (lux) by activity
- Ambient living/lounge: 100 lux
- Dining/work: 300 lux at the surface
- Task reading: 300-500 lux focused on reading plane
- Night path lighting: 5-30 lux low-level motion-activated
Fixture types and product guidance
Choose fixtures that combine performance with compactness and low visual clutter.
- LED strip with diffuser: Flexible for under-bed, under-sofa, cove, and toe-kick lighting. Look for high CRI (90+) and tunable white drivers.
- Wall washer or linear uplight: Creates vertical illumination that reinforces depth and height.
- Adjustable wall sconces: Offer targeted reading light and fold away visually when not in use.
- Mini pendants: Hang low over a fold-out dining table for intimacy and clear task lighting when deployed.
- Smart bulbs and modules: Useful for renters; choose tunable white bulbs compatible with your hub.
- Contact/tilt sensors & smart controllers: Select models that are small, reliable, and supported by your chosen ecosystem (Zigbee/Thread/Matter/Wi-Fi).
Control platforms and future-proofing
Choose a control ecosystem that balances convenience, privacy, responsiveness, and long-term compatibility.
- Home Assistant: Highly flexible and local-first; excellent for complex automations and privacy-conscious users.
- Apple HomeKit: Great for iOS users who value privacy and a polished UI; check for Matter support for cross-platform ease.
- Google Home and Amazon Alexa: Easy onboarding and voice control; consider cloud dependency and privacy trade-offs.
- Zigbee/Z-Wave vs Wi-Fi vs Thread: Zigbee/Z-Wave provide mesh reliability and battery-friendly sensors; Wi-Fi is easy but can overload networks; Thread + Matter is increasingly the best path for device interoperability in 2025.
Automation logic and sample scene flows
Below are example automations you can implement in most smart home platforms. They are modular and meant to be adapted to your device capabilities.
-
Fold-out bed automation:
- Trigger: Contact sensor detects bed open.
- Actions: Dim overheads to 40%, set wall-wash to 2700K at 60%, turn on bedside adjustable reading light at 70% (if presence detected), enable under-bed glow at 10% for ambient comfort.
- Fallback: If motion sensor indicates no presence within 10 minutes, fade lights to night path mode (10-20 lux).
-
Daytime work/dining scene:
- Trigger: Tilt sensor indicates table deployed OR contact sensor + time-of-day (08:00-18:00).
- Actions: Set task lights to 3500-4000K at 80%, raise wall-wash to 40% for balanced ambient, disable night path LEDs, ensure lux sensor allows daylight dimming if window provides sufficient light.
-
Night pass-through mode:
- Trigger: Motion sensor detects hallway movement between 23:00-06:00.
- Actions: Turn on low-level toe-kick LEDs at 5-15 lux with 800-1000ms fade-in to avoid startling; keep overheads off.
-
Guest override:
- Trigger: Quick press physical switch or app button labeled "Guest Mode."
- Actions: Temporarily lock automations to standard preset scenes that guests can control easily (e.g., "Relax," "Read," "Bright").
Step-by-step installation plan (DIY-friendly)
Follow these steps to implement a basic sensor-driven anchor for a convertible sofa-bed.
- Audit the space: Measure ceiling height, distances from windows, and furniture footprints. Photograph sightlines.
- Choose your anchor: Decide whether a wall-wash, backlit panel, or under-furniture glow will be the primary anchor.
- Pick sensors: Get a contact sensor for the sofa mechanism, a PIR for the doorway, and a lux sensor near the window.
- Test layout with temporary mounts: Use painter's tape and magnets to test LED placement and sensor orientation for 48 hours.
- Install fixtures: Use low-profile channels and removable adhesives for LED strips; mount wall washers or sconces per manufacturer instructions.
- Wire controllers: If using hard-wired drivers, ensure power is off before connecting. For plug-in solutions, select outlets that wont intrude on flow.
- Pair sensors and lights to your hub: Group devices into logical zones (e.g., "Sofa Zone").
- Create scenes and test: Simulate transitions—open and close the sofa, test presence when sitting, and run timed daylight tests.
- Refine sensitivity and timing: Adjust sensor sensitivity, fade durations, and lux thresholds over two weeks of use.
Renter-friendly alternatives
- Battery-powered sensor kits (Zigbee or Bluetooth) that attach with removable adhesive.
- Plug-in smart LED strips and floor lamps that dont require hardwiring.
- Magnetic contact sensors that stick to frames and can be removed when moving.
- Portable hubs like a small Wi-Fi bridge or a battery-powered Zigbee hub to avoid permanent infrastructure changes.
Safety, code, and when to hire an electrician
- Any permanent changes to mains wiring should be performed by a licensed electrician and comply with local code.
- Ensure drivers and dimmers are compatible with fixture wattage to avoid overheating.
- Install thermal protection for taped LED strips inside confined channels.
- If your plan includes recessed fixtures or structural mounting, hire a pro for safe and compliant installation.
Energy impact and budgeting
LED-based sensor-driven systems are energy-efficient. Below is a rough cost framework (prices vary by region and brand):
- Basic sensor kit (contact + PIR + lux): $80-$200
- High-quality LED strip (RGBW, tunable white): $40-$150 per meter (driver excluded)
- Wall-wash linear fixture: $80-$300 each
- Smart hub/controller: $60-$200 (more for advanced hubs)
- Professional installation: $150-$500+ depending on wiring and fixture complexity
Energy savings come from daylight harvesting and vacancy-based auto-off. Expect payback on lighting upgrades within 1-4 years depending on use and electricity prices.
Maintenance and longevity
- LEDs: 25,000-50,000 hour lifespan typical; choose high-quality LEDs to prevent early color shift.
- Sensors: Replace batteries annually for high-use sensors; check sensor lenses for dust and clean quarterly.
- Firmware: Keep hub and device firmware up to date for security and new features.
- Recalibrate: Re-check lux thresholds seasonally as daylight patterns change.
Troubleshooting common problems
- False triggers: Reduce PIR sensitivity, relocate sensor, or add presence sensors for redundancy.
- Dead zones: Reposition motion sensors or add a second device; confirm mesh network quality for Zigbee/Z-Wave.
- Flicker on dimming: Use LED drivers compatible with your dimmers; update drivers if flicker persists.
- Lux sensor reading off: Avoid placing lux sensors in direct sunlight and recalibrate thresholds.
Style and decor tips to complement light anchors
- Material palette: Matte, low-reflectance finishes prevent glare; use textured wall coverings behind anchors for depth under wall-wash lighting.
- Color choices: Warmer wall colors amplify the cozy effect of warm white anchors; cool neutrals balance bright work scenes.
- Minimal clutter: Keep the anchor zone visually clean so the lighting and the furniture speak clearly.
- Integrated storage: Conceal controllers and power supplies behind furniture panels to maintain a clean aesthetic.
Case study deep dives (extended examples)
Below are expanded real-world scenarios showing planning, devices, and outcomes.
Case study 1: 28m2 studio—sofa that becomes guest bed
- Problem: Sofa used daily—when guests stay it converts to a bed, but the space lacks a permanent-feeling bedroom area.
-
Solution: Install a linear wall-wash behind the sofa, IP20 LED strip under the sofa base, a contact sensor on the sofa mechanism, and a smart hub.
- Day: Wall-wash at 30% (3500K), ambient ceiling 100 lux. Task lamp near sofa for reading at 400 lux when needed.
- Night/guest: Contact sensor triggers warm 2700K scene; under-sofa glow at 12% creates bedside feel; bedside reading lamp turns on at low intensity when presence detected.
- Outcome: Guests perceived the sleeping area as intentional and comfortable; daily transitions became effortless and energy use dropped 22% from automation.
Case study 2: Micro-apartment with Murphy bed and work nook
- Problem: The bed occupies an adjacent wall to a compact desk; lighting previously required manual switching and created glare on laptop screens.
- Solution: Tilt sensor on Murphy hinge, presence sensor at desk, lux sensor near window, and two adjustable wall sconces. Automation sets a cooler, brighter scene for daytime work and a warm, dimmed scene for bed-down.
- Outcome: Occupant reported improved work focus during the day and quicker wind-down at night; glare reduced by 60% after adding adjustable sconces and angling wall-wash away from screens.
SEO and content strategy notes for publishers
If youre producing content or product pages on this topic, focus on long-tail keywords and user intent phrases such as "sensor-driven lighting for small apartments," "convertible furniture lighting ideas," and "how to light a Murphy bed." Use the following content structure for SEO:
- Title tag: include primary keyword early (e.g., "Sensor-Driven Ambient Lighting for Convertible Furniture")
- Meta description: concise benefit-driven text under 160 characters—use the meta-friendly intro above as a template
- Headers: use descriptive H2s and H3s for scenes, installation, and product lists
- Internal links: link to related articles on tuning color temperature, smart home hubs, and LED selection
- Schema: add Product and HowTo schema for step-by-step installation guides and product lists
Frequently asked questions (FAQ)
-
Q: Are sensor-driven systems worth it for renters?
A: Yes—battery sensors, plug-in LED strips, and removable adhesive mounts give renters most benefits without permanent changes.
-
Q: Will automated lighting wear out LEDs faster?
A: No. LEDs last longest when run at moderate currents and proper thermal conditions; frequent short cycles have minimal impact compared to heat and driver quality.
-
Q: Can I use sensors to protect my furniture (prevent accidental deployment)?
A: Yes. Use position sensors combined with motion or pressure detection to trigger alerts if furniture is opened unexpectedly (useful in homes with children or pets).
-
Q: How do I avoid my automation from being annoying?
A: Test and tune fade times, sensitivity, and thresholds. Provide an easy manual override and a "guest mode" so others aren't surprised by automated scenes.
Final checklist before you get started
- Measure and photograph the space for planning
- Decide on primary anchor type (wall-wash, backlight, underglow)
- Choose sensors that match the actions you need to detect
- Prefer tunable white LEDs for flexibility across scenarios
- Pick a control platform and ensure device compatibility
- Prototype with temporary mounts, then commit to permanent installation
- Test and fine-tune automations over a two-week period
Conclusion
In small, convertible spaces, lighting becomes the architecture. Sensor-driven ambient lightscapes let you anchor movable furniture, enabling it to read as intentional and comfortable across uses. The combination of contact sensors, motion detection, lux harvesting, and tunable white LEDs provides a flexible toolkit for designers, renters, and homeowners alike. Start with one well-defined anchor, automate thoughtfully, and iterate based on real-world use—your space will feel larger, calmer, and more functional as a result.
Visit XENTAR for more lighting, decor & furniture curated for modern homes and creative spaces.


Share:
Biophilic Smart Lighting for Small Spaces: Using Ocean-Wave Projectors, Warm LEDs & Sensor Scenes to Make Modular Furniture Feel Built-In
Activity-Based Smart Lighting for Tiny Homes: Anchor Convertible Furniture with Sensor Scenes and Emotional Zoning