Introduction: Why Seamline Lighting Matters in 2025
As urban living tightens and micro-apartments become mainstream, designers and renters need lighting strategies that amplify space, hide modular joins, and deliver smart, energy-conscious control. Seamline lighting—continuous floor-to-ceiling LED seams integrated with sensor-driven scenes—does all of this. This long-form guide covers design, hardware, installation, smart integration, budgets, styling, and real-world examples to help you create a custom, built-in effect without demolition.
SEO-Friendly Benefits at a Glance
- Perceived space expansion via vertical light lines and clean outlines
- Concealed modular seams for a bespoke, built-in appearance
- Sensor scenes for hands-free convenience and safety in compact layouts
- Energy-efficient operation with daylight harvesting and automated dimming
- Rental-friendly upgrades that are reversible yet high-impact
Core Concepts: What Is Seamline Lighting and Why It Works
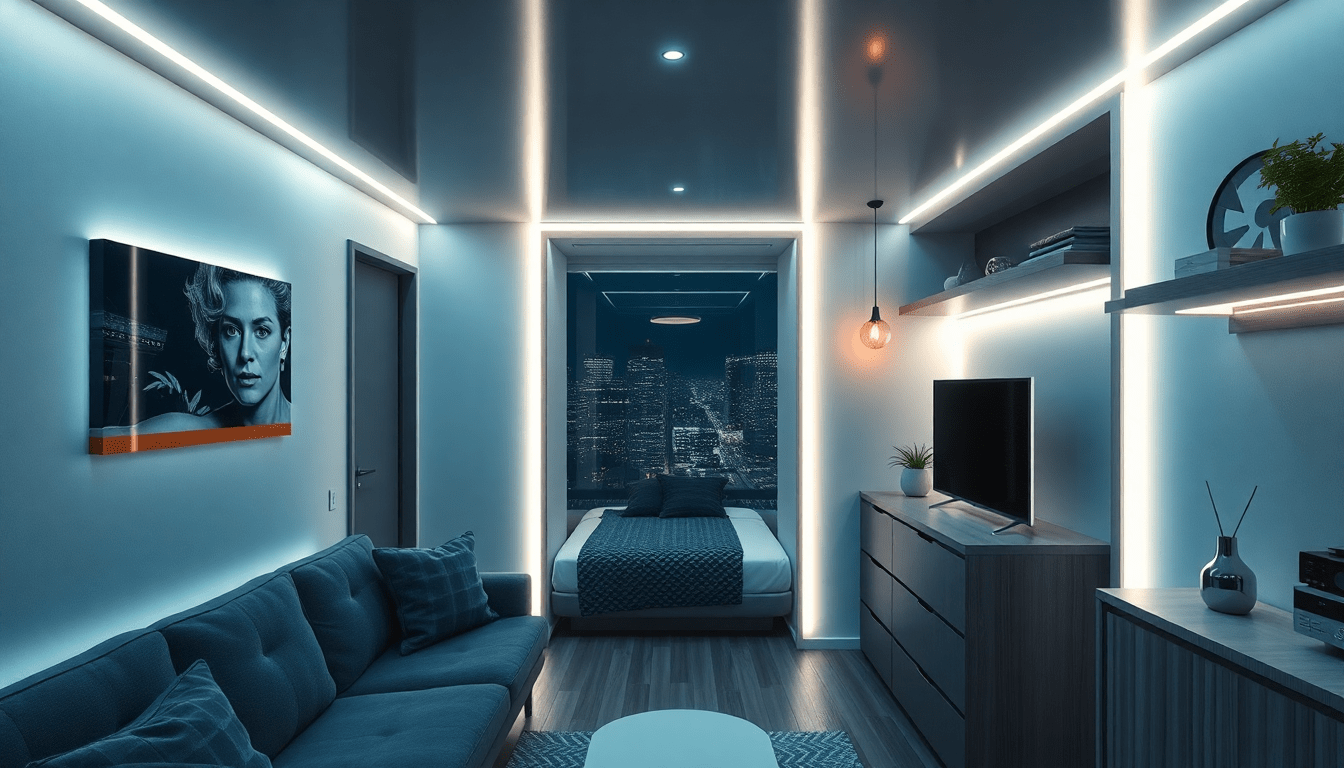
Seamline lighting uses high-density LED strips installed in discrete channels along seams—floor to ceiling edges, furniture joins, shelving gaps, and cabinetry verticals. The visual continuity created by an even, diffused line of light tricks the eye into reading separate modules as a single, continuous surface. When combined with sensors and pre-programmed scenes, the system behaves like an integrated fixture rather than a collection of add-ons.
Design Strategies: Where to Place Floor-to-Ceiling LED Seams
Placement transforms perception. Use these seam locations to emphasize height, mask modular joins, and strategically illuminate function zones.
- Wall-to-ceiling seams: Emphasize verticality and draw the eye upward for perceived height.
- Wall-to-floor perimeter seams: Create soft, continuous ambient light that reduces shadows and makes small rooms feel bigger.
- Between modular panels or shelving modules: Hide breaks and mismatches to read as custom cabinetry.
- Along wardrobe edges and bed headboards: Convert freestanding furniture into seemingly built-in fixtures.
- Kitchen vertical joins and under-cabinet seams: Brighten task zones and hide modular joints in galley kitchens.
- Partition seams in studio layouts: Separate functional zones while preserving light flow.
Sensor Scenes: How to Make Lighting Feel Intelligent and 'Built-In'
Sensor scenes create behavior—lighting that anticipates actions and reacts contextually. Combine occupancy, ambient light, motion, and touch sensors to orchestrate scenes that match daily routines.
- Entry/Welcome Scene: A motion sensor near the door triggers warm, medium-brightness perimeter seams for a soft welcome.
- Cooking Scene: Cabinet and under-counter seams switch to cooler, higher-lumen output for clarity during food prep.
- Work/Study Scene: Desk and shelving seams move to 3500–4000K with increased lumens to improve focus and color rendering.
- Relax/Evening Scene: Warm, dimmed seams (2700–3000K) create layered light for winding down.
- Night Path Scene: Low-lumen floor seams activated by motion for safe navigation without disrupting sleep cycles.
- Daylight Harvesting: Ambient sensors reduce output when natural light is ample, optimizing comfort and savings.
Technical Specifications: Choosing the Right Components
Select hardware with the right performance characteristics for continuous, premium-looking seams.
- Color Temperature (CCT): Use 2700–3000K for cozy zones, 3000–3500K for general living, and 3500–4000K for tasks.
- Color Rendering Index (CRI): Aim for CRI 90+ to preserve accurate hues on textiles, finishes, and decor in small spaces.
- Lumen Density: 400–800 lm/m is a practical range—lower for accent/perimeter light, higher for task areas.
- LED Density & Diffusers: High-density LED strips paired with aluminum channels and frosted diffusers minimize hotspots and create smooth, linear light.
- Voltage & Drivers: 12V/24V constant-voltage systems are common; pick dimmable drivers rated 20% above load for longevity.
- IP Rating: IP20 for dry interiors; IP44 or higher for kitchen and bathroom seams near moisture.
- Connectivity & Protocols: Matter and Zigbee for compatibility with multi-vendor smart platforms; Bluetooth or Wi-Fi for direct app control.
Installation Best Practices for a Professional Look
Whether DIY or professional, follow these practices to maintain visual continuity and safety.
- Plan continuous runs first: minimize connectors and visible joints for an uninterrupted look.
- Use recessed aluminum channels: surface-mounted channels are acceptable, but recessed channels look custom and reduce glare.
- Choose frosted diffusers: they prevent LED dots and give a clean, architectural line.
- Hide drivers and routing: tuck drivers in cavities behind furniture or in loft spaces; conceal wiring within grooves or behind panels.
- Test scenes and sensor angles before sealing channels or finalizing trim work.
- Hire a licensed electrician whenever mains wiring or permanent fixtures are involved, especially in rental properties with strict code requirements.
Step-by-Step DIY Installation Guide
This walkthrough is for experienced DIYers. For mains wiring, consult a pro.
- Measure and plan: Map runs on a floor plan, noting seam locations, driver positions, and sensor placements.
- Choose channels and strips: Order channels long enough to minimize seams; match strip density to lumen needs.
- Prep surfaces: Clean and prime mounting areas; confirm flush fit for recessed channels if applicable.
- Install channels: Mount with screws or adhesive recommended by the manufacturer; ensure straight runs and consistent depth.
- Route wiring: Run low-voltage cabling to driver locations; keep wire lengths within recommended limits.
- Connect drivers and controllers: Use connectors or solder joints per spec; securely fasten drivers with adequate ventilation.
- Mount sensors: Position occupancy and ambient sensors to avoid false triggers; aim sensors along primary traffic paths and sight lines.
- Test and tune scenes: Use the control app or controller interface to configure brightness, color temperature, and sensor delays.
- Finish diffusers and trim: Snap on frosted diffusers and add paint or trim to conceal channel edges for a built-in appearance.
Wiring, Safety & Code Considerations
Safety first. These notes help you plan responsibly.
- Low-voltage wiring is safer and common for LED strips, but the drivers often require mains input—protect and contract that work properly.
- Check local electrical codes for permitted fixtures in rental and multifamily units; some municipalities require licensed installation for permanent changes.
- Provide ventilation for drivers: avoid sealed compartments that trap heat and shorten lifespan.
- Use certified components (CE, UL, ETL) and avoid no-name strips that may overheat or flicker.
Integrating Seamline Lighting with Smart Home Platforms
Interoperability is more important than ever. Choose control stacks that play well with your ecosystem.
- Matter-compatible controllers: future-proof your system for broad cross-platform control (HomeKit, Alexa, Google Home).
- Zigbee or Z-Wave: Ideal for mesh reliability in multi-room installations; works through smart hubs.
- Bluetooth & Wi-Fi: Easy setup for single-room installs but can be less reliable for large or multi-zone networks.
- Scene automation: Use geofencing, schedules, and sensor triggers to create robust, low-friction behaviors.
- Third-party integrations: Connect lighting scenes to climate, blinds, or entertainment systems for cohesive environmental control.
Real-Life Styling Examples & Case Studies
Practical examples show how seamline lighting lifts typical micro-apartment layouts.
Case Study 1: 280 sq ft Studio with Murphy Bed
- Problem: A small studio needed separation between sleeping and living areas without losing openness.
- Solution: Floor-to-ceiling LED seams flanking the Murphy bed and a perimeter ceiling seam created a vertical visual anchor. Motion sensors at the bed’s sides triggered warm night scenes while work seams stayed cool and bright.
- Result: The Murphy bed read as built-in cabinetry; the room felt taller and more cohesive. Energy savings from occupancy-based scenes reduced lighting runtime by 40%.
Case Study 2: Galley Kitchen in a Micro-Flat
- Problem: A narrow galley kitchen had modular cabinet mismatches and dim counters.
- Solution: Install LED seams along cabinet vertical joins, under-cabinet task strips, and a thin floor seam along the toe-kick. Ambient sensors reduced output during sunny afternoons.
- Result: Counters became safer and more usable; seams disguised cabinetry gaps. The integrated lighting elevated perceived quality without replacing cabinets.
Case Study 3: Office-Nook Partition in a 350 sq ft Flat
- Problem: A shared wall between workspace and living area felt clunky and dark.
- Solution: Add a floor-to-ceiling seam at the partition edge and layered shelving backlight. A scene called 'Focus' brightened the desk seams independently from living area seams.
- Result: The partition visually separated zones while preserving light continuity. The 'Focus' scene increased productivity and comfort for remote work.
Budgeting & Cost Breakdown
Costs vary by component quality, length of runs, and professional labor. Use these ballpark figures (USD) for planning a typical micro-apartment seamline project:
- High-density LED strip: $10–$40 per meter
- Aluminum channels with diffusers: $5–$15 per meter
- Drivers and controllers: $30–$200 depending on wattage and smart features
- Sensors: $20–$120 each for occupancy, ambient, or motion sensors
- Installer labor: $300–$1,200 depending on complexity and local rates
- Total typical DIY project for a studio: $300–$1,000; pro install: $800–$3,000
Sustainability, Energy Savings & Lifecycle
Seamline systems can be both beautiful and green when specified responsibly.
- LED lifespan: Expect 35,000–50,000 hours for quality strips; factor warranties into purchase decisions.
- Energy management: Use daylight harvesting and occupancy sensors to minimize runtime and costs.
- Materials & recycling: Choose recyclable aluminum channels and drivers from manufacturers supporting component take-back programs where possible.
Maintenance, Troubleshooting & Longevity
Simple care keeps seams looking premium for years.
- Cleaning: Wipe diffusers quarterly to avoid haze from dust and oils.
- Check drivers: Replace drivers every 5–10 years or when flicker or reduced output appears.
- Warm-up and dimming: Avoid prolonged max brightness; set default scenes to moderate levels to extend LED life.
- Spare parts: Keep extra connectors and a short spare length of the same LED strip for future repairs.
Buying Guide: Priorities and Pitfalls
Shopping smart reduces headaches and achieves a store-bought look at home.
- Prioritize high CRI and uniform diffuser performance over the lowest price per meter.
- Confirm dimmer and driver compatibility before purchase; mismatches cause flicker and shortened lifespan.
- Avoid overly thin, low-density strips that produce dotted light lines rather than continuous seams.
- Plan connectors: Soldered joins are neat and reliable for permanent installs; quick connectors favor flexibility in rental situations.
Professional vs DIY: When to Hire an Electrician
- Hire a professional if: mains wiring is involved, you lack experience with low-voltage power distribution, your building has strict code requirements, or the installation requires recessed channels in structural elements.
- DIY is reasonable if: the project is low-voltage-only, runs are surface-mounted, and you have basic electrical and carpentry skills. Always consult local rules about permitted electrical work in rental units.
Styling Tips: Pairing Seamline Lighting with Decor
Seamline lighting works best as one layer in a multi-layered lighting strategy. Consider these styling principles:
- Mix light temperatures: Pair warm ambient seams with cooler task seams to preserve mood and functionality.
- Use texture and shadow: Textured wall finishes and matte cabinetry create soft shadowing next to seams for depth.
- Keep lines clean: Minimalist trim and narrow channel profiles reinforce the built-in aesthetic.
- Balance brightness with furnishings: Avoid overlit rooms that wash out color and contrast—use seams as accents rather than the sole light source.
Small Space Psychology: How Light Alters Perception
Light modifies scale and mood. Vertical seams emphasize height, while continuous perimeter lighting dissolves boundaries between furniture and walls—creating the impression of a larger, airier space. Sensor scenes reduce cognitive load by automating lighting states, which is particularly valuable in high-density living where every square inch and decision matters.
Quick Checklist for Implementing Seamline & Sensor Scenes
- Map seam runs and sensor locations on a detailed plan
- Choose LED strip density, diffuser channels, and driver wattage
- Verify smart controller protocol (Matter/Zigbee/Wi-Fi/Bluetooth)
- Purchase certified components and spare parts
- Test sensor placement and scene transitions before finishing trim
- Document wiring and scene settings for future maintenance or landlord handover
Final Thoughts: Design Impact and Practical Value
Seamline floor-to-ceiling LED seams paired with sensor scenes are a powerful tool for making modular furniture feel built-in. They offer visual cohesion, functional automation, energy savings, and a professional finish that transforms micro-apartments into highly livable, well-lit spaces. Whether you’re a renter seeking reversible upgrades or a designer specifying a compact unit, seamline lighting elevates both perception and performance of small-home interiors.
Visit XENTAR for more lighting, decor & furniture curated for modern homes and creative spaces.


Share:
Light Framing: Sensor-Activated Accent Strategies to Make Modular Furniture Look Custom in Small Apartments
Light Anchors for Microhomes: A Practical Smart-Lighting Toolkit to Make Modular Furniture Read as Architecture