Introduction: Why Lighting Defines Perception in Small Spaces
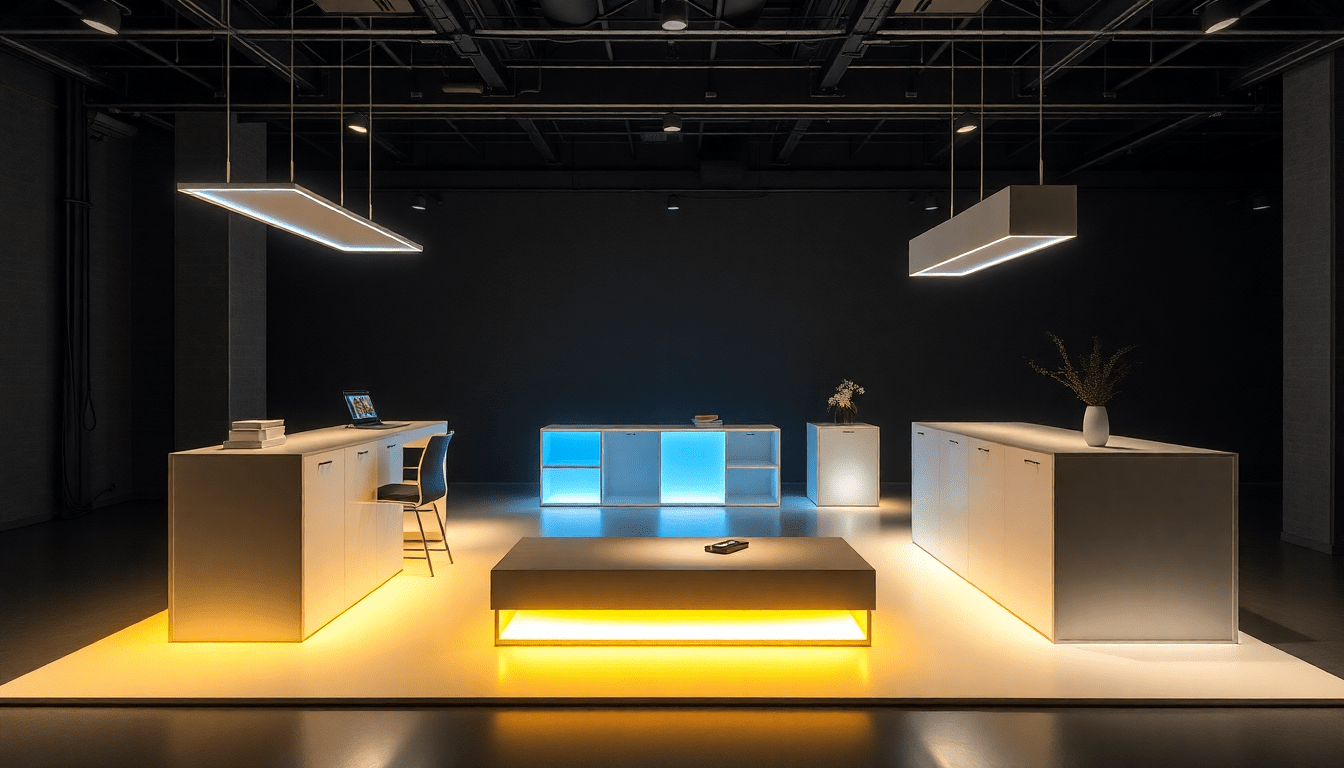
In 2025, compact living continues to challenge designers and renters alike: how do you create a high-end, tailored interior when furniture must remain modular and mobile? The answer increasingly lies in lighting. Light framing—strategic placement of low-profile accent lighting around and inside modular units—creates visual depth, outlines form, and produces the perception of built-in craftsmanship. When paired with sensor activation, these accents behave intelligently: they come alive when needed, conserve energy, and maintain a seamless experience that feels custom and intentional.
Meta-Friendly Summary (SEO-Friendly Intro)
How Light Framing Changes the Way We See Modular Furniture
Light framing works on both practical and perceptual levels. Practically, it adds usable illumination—task lighting, pathway guidance, display illumination—without adding bulky fixtures. Perceptually, light creates separation between furniture and wall, emphasizes edges and profiles, and highlights materials and textures, making off-the-shelf modular pieces feel bespoke.
Core Principles of Sensor-Activated Accent Strategies
- Hierarchy of light: Combine ambient, task, and accent layers so accents feel intentional, not flashy.
- Invisible hardware: Conceal sensors, wiring, and profiles to enhance the illusion of built-in lighting.
- Context-aware activation: Use lux and motion sensors to ensure accents activate only when appropriate.
- Material synergy: Match color temperature and intensity to the furniture finish for a cohesive look.
- Ease of reversibility: Design with renters in mind—battery or USB power and non-destructive mounts keep changes temporary.
Sensor Types and Their Best Uses (Detailed Guide)
Choosing the right sensor is as important as selecting the light source. Each sensor type has strengths and limitations. Below is a practical guide to pairing sensors with common modular furniture scenarios.
-
PIR (Passive Infrared) Motion Sensors
- Best for: Entry consoles, media units, kitchen islands, hallways.
- Advantages: Reliable for larger motions, energy-efficient, broad coverage.
- Considerations: Can be triggered by pets; place to avoid false positives and use adjustable sensitivity.
-
Microwave Motion Sensors
- Best for: Larger open-plan spaces where sensitivity is needed through thin partitions.
- Advantages: Detects movement through some materials, adjustable range.
- Considerations: More prone to false triggers near busy public-facing windows or neighbors.
-
Proximity and Capacitive Touch Sensors
- Best for: Bedside modules, desks, headboards—where approach or a gentle wave should trigger light.
- Advantages: Elegant, unobtrusive, can be very low-power.
- Considerations: Calibration needed for consistent performance across materials.
-
Magnetic Reed and Door Sensors
- Best for: Cabinet interiors, wardrobe lighting, drawers.
- Advantages: Activates precisely when doors open; good for storage illumination.
- Considerations: Requires alignment and space for sensor placement.
-
Ambient Light (Lux) Sensors
- Best for: Preventing activation during daylight or when room brightness is already sufficient.
- Advantages: Saves energy, prevents nuisance activation.
- Considerations: Should be paired with motion sensors for conditional behavior.
-
Pressure and Contact Sensors
- Best for: Under cushions or seating to trigger low-level pathway lighting or reading accents.
- Advantages: Predictable activation when furniture is used.
- Considerations: Wiring can be intrusive if not planned into modular cavities.
Light Sources: Choosing LED Types, Color Temps, and Optics
LED technology has matured—choose carefully to match your aesthetic and functional goals.
- LED Tape/Strips: Best for continuous edge glows and under-cabinet lines. Look for high CRI (>90) for true color rendering on textiles and wood.
- COB (Chip on Board) LED Strips: Produce a seamless, single-source look without visible LED dots—ideal for floating shelves and kickboards.
- LED Pucks & Miniatures: Good for interior shelf spots and display lighting; choose diffuse lenses for softer shadows.
- Linear Bars: Rigid bars are excellent for inside cabinets and behind recessed panels where straight lines are required.
- Tunable White & RGBW: Tunable white helps match daylight cycles or create warm evening moods; RGBW adds color accents for seasonal styling.
Color Temperature Strategy
- Warm woods: 2700K–3000K to enhance warmth and grain.
- Mixed palettes and modern neutrals: 3000K–3500K for balance.
- Contemporary/industrial materials: 3500K–4000K for crisp, modern contrast.
- Showcase textiles and art: High CRI with appropriate temperature to maintain color fidelity.
Placement and Framing Techniques (In-Depth)
Successful framing depends on subtlety. Here are practical tactics to make modular furniture appear custom-made.
-
Undercut and Kickboard Lighting:
- Mount strips under floating shelves, under cabinets, or along kickboards to create a floating effect and a gentle pathway light.
- Use diffusers recessed 3–10mm to hide hot spots and produce a smooth wash.
-
Back-Cove and Drop Shadows:
- Install LEDs behind the back edge of media units or shelving to cast a halo and separate furniture from the wall.
- Adjust distance from wall to control the softness of the halo; deeper setbacks create softer gradients.
-
Vertical Edge Washes:
- Run concealed vertical LEDs along open edges to mimic trim or reveal lines, making a modular cube read as a framed unit.
- Useful on wardrobes, room dividers, and tall shelving to emphasize height.
-
Interior Shelf and Cubby Illumination:
- Place mini linear lights at the top of each shelf or inside display compartments; use recessed magnets or clips for renter-friendly swaps.
- Pair with magnetic door sensors for automatic interior activation only when doors are opened.
-
Accent Spot Framing:
- Use micro-spots or directional LEDs to frame art, ceramics, or plants—sensor-triggered for spotlighting on approach.
- Combine with diffused edge lighting to produce both silhouette and detail emphasis.
Wiring, Power, and Practical Install Considerations
Small apartments demand pragmatic power strategies. Here are options from no-wiring to semi-permanent installs.
-
Battery-Powered & Rechargeable:
- Best for renters—choose rechargeable units with USB-C charging for convenience.
- Battery packs can be hidden behind or inside modular panels; use in-line switches or sensors with low standby draw.
-
USB & Power Bank Solutions:
- Plug-in strips are easy to hide and allow high-power LEDs without hardwiring; pair with power banks or smart plugs for scheduling.
-
Low-Voltage DC Wiring:
- Run 12V/24V DC through hollow modular legs or behind panels for neat installs—use central driver boxes with quick-disconnect terminals for modularity.
-
Hardwired & Professional Install:
- For long-term homes, hardwiring into wall circuits with dedicated dimmers or smart controls provides the cleanest finish and best reliability.
Smart Controllers, Sensors, and Automation Logic
Intelligent control is what turns accent lighting into an experience. Here are strategies and common automation rules that deliver a polished result.
- Controllers: Choose Wi-Fi, Zigbee, or Bluetooth controllers depending on your ecosystem. Ensure controllers support sensor inputs or integrate via a hub.
-
Rule Examples:
- Motion + Lux: Motion triggers accent lights only if ambient lux is below a threshold.
- Approach-Based Zones: Proximity sensors at desk or bed trigger low-intensity task light; full task brightness only if presence continues for X seconds.
- Night Mode: Motion triggers dim pathway lights (<10%) between 11pm–7am to avoid disrupting sleep.
- Scene Sync: Use scenes (Relax, Entertain, Work) to coordinate tunable whites and accent brightness based on time and activity.
- Integration: Link with voice assistants and smart home hubs for hands-free control; use local rules where possible to reduce latency.
Design Scenarios: Room-by-Room Strategies
Below are practical, scenario-based strategies to help visualize how sensor-activated light framing transforms modular furniture in each room.
-
Living Room — Modular Media Wall
- Edge glow along top and under the floating console creates a subtle shelf separation. Use a PIR sensor tuned to the seating zone to activate a soft backlight for movie nights without turning on overhead lights.
- Install directional micro-spots with proximity triggers for artwork; program a dim fade on prolonged inactivity to save power.
-
Bedroom — Modular Wardrobe & Headboard
- Incorporate magnetic reed sensors inside wardrobe doors to light interior shelves only when open. Add proximity sensors on the headboard for bedside reading lights that ramp up with a wave.
- Under-drawer kick lighting provides airport-style lighting for a hotel-like custom feel.
-
Kitchen — Compact, Convertible Workzone
- Under-cabinet COB strips with motion sensors light prep zones when hands approach; pair with lux sensors to avoid daytime activation.
- Use warm tuning near dining or breakfast nooks and cooler whites near actual prep surfaces for clarity.
-
Home Office — Modular Desk and Shelving
- Proximity sensors trigger desk task lighting as you approach; interior shelf lighting highlights books and objects and can be scheduled for 'video call' scenes.
- Consider bias lighting behind monitors to reduce eye strain and make the desk wall feel like a designed backdrop.
-
Entryway — Console and Hallway Modules
- Motion-sensor accent strips under a console create a welcoming glow and help with safe foot traffic. Use a brief delay-off to avoid rapid switching in comings-and-goings.
DIY Guides: Step-by-Step Projects for Renters and New Builders
Here are two step-by-step projects you can complete with minimal tools.
-
Project 1 — Floating Console Edge Glow (No Wiring)
- Select adhesive LED tape (COB or high-CRI flexible) with USB power pack.
- Measure under-edge length and cut to size (observe cut marks).
- Apply opal diffuser or aluminum channel to conceal diodes for a uniform glow.
- Mount rechargeable USB battery pack inside a hollow cavity or behind console with double-sided tape; route USB cable through a seam to the edge strip.
- Install a small PIR stick-on sensor near the front edge; test sensitivity and adjust to avoid false triggers from pets.
- Configure sensor delay to ~30–60 seconds to prevent flicker when moving by the console quickly.
-
Project 2 — Wardrobe Interior Puck Lights (Magnetic Sensor)
- Purchase magnetic reed sensors and battery puck lights that support remote activation or have external trigger inputs.
- Mount sensor on door frame and magnet on the door for alignment; attach puck light inside top shelf with adhesive or screws.
- Wire or connect sensor output to the puck light input where compatible; for separate units, choose puck lights with integrated door-sensing options or use a small smart relay.
- Test opening/closing behavior; set auto-off timer to 1–5 minutes to conserve battery life.
Budgeting, Timelines, and Cost Estimates
Approximate costs and timelines help prioritize projects:
-
Low-Budget, Quick Wins ($30–$150):
- Battery puck lights, adhesive LED tape with USB power banks, stick-on PIR sensors. Timeline: 1–3 hours per module.
-
Mid-Budget, Semi-Permanent ($150–$600):
- Higher-quality COB strips, diffusers, wireless smart controllers, rechargeable drivers. Timeline: 1–2 weekends with basic tools.
-
Premium, Hardwired ($600+):
- Professional low-voltage runs, integrated drivers, smart home integration hubs, custom channels. Timeline: 1–2 weeks including electrician scheduling.
Maintenance, Troubleshooting, and Longevity Tips
- Use LED drivers with over-temperature protection and choose strips with good thermal backing to maximize lifetime.
- Schedule firmware updates for smart controllers and test sensor performance seasonally—reposition if false triggers occur after layout changes.
- Keep spare adhesive channels, connector cables, and batteries in a labeled small kit for quick repairs.
- If LEDs flicker or dim prematurely, check connectors and driver ratings—underrated drivers cause stress and shorten lifespan.
- Clean diffuser profiles periodically with a soft cloth to prevent dust buildup that softens output unevenly.
Common Mistakes and How to Avoid Them
- Avoid placing PIR sensors where curtains or ventilation flow trigger constant activation—use proximity or contact triggers in tight zones instead.
- Don’t over-illuminate: accents should be about 10–25% of task light levels, used to frame rather than dominate.
- Don’t mix wildly different CRIs and color temperatures within a single focal furniture piece; aim for cohesive selections.
- Test placement with temporary strips before committing to channels—this helps find the ideal distance from the wall or edge.
Case Studies: Real-World Transformations
Two short case studies illustrate practical outcomes and lessons learned.
-
Studio Apartment, 34 m2 — Media Wall Makeover
- Challenge: A flat modular TV stand felt visually heavy and clashed with a slim open shelf system.
- Solution: Added COB back-cove lighting and under-console edge strips controlled by a single PIR sensor at the seating zone. Tunable white set to warm in evenings for a cinema feel.
- Result: Perceived depth increased; modular units read as continuous, designed cabinetry. Energy usage remained low due to sensor-limited operation.
-
Two-Bedroom Apartment, 65 m2 — Modular Bedroom System
- Challenge: Off-the-shelf wardrobe and shelving felt disjointed and lacked a cohesive bedside solution.
- Solution: Integrated magnetic door sensors for wardrobe lighting, proximity sensors for bedside reading lights, and vertical edge strips on wardrobes to create matching trim lines.
- Result: Spaces felt cohesive and purposeful; residents reported a higher satisfaction with perceived custom quality.
Shopping Checklist: What to Buy
- High-CRI LED strips or COB tape (with diffusers)
- Sensor modules (PIR, proximity, reed switches) suitable for intended zones
- Smart controller or simple relay with sensor input capability
- Power solution: USB packs, rechargeable batteries, or low-voltage drivers
- Mounting channels, opal diffusers, and adhesive solutions
- Connector kits, quick-disconnects, and spare drivers
Frequently Asked Questions (SEO-Friendly FAQs)
-
Will sensors drain batteries quickly?
Low-power sensors are designed to have minimal standby drain. Choose modules with proven low standby current and rechargeable battery packs for best longevity.
-
Can I install this in a rental?
Yes—use non-destructive mounting (adhesive channels, magnetic mounts, USB power) and ensure reversibility for deposits and landlord rules.
-
How do I prevent false triggers from pets?
Use sensors positioned above typical pet height, lower sensitivity, or use proximity/contact sensors instead of wide-area PIR sensors.
-
Is smart home integration necessary?
Not necessary, but smart controllers add convenience and scene coordination. Local sensor logic alone can provide a reliable and private experience.
Final Design Checklist Before You Start
- Define functional goals: Which zones need task, accent, or pathway light?
- Choose sensor types per zone and plan placements to minimize false triggers.
- Select LED type and color temperature to complement finishes.
- Decide on power strategy (battery, USB, low-voltage, hardwired).
- Prototype with temporary strips and sensors to confirm aesthetic and behavior before finishing channels.
Conclusion: Small Details Create a Bespoke Feel
Light framing with sensor-activated accents is one of the most cost-effective and reversible ways to give modular furniture a custom, built-in character in small apartments. With careful sensor selection, thoughtful placement, and appropriate control logic, a few meters of LED and a couple of discreet sensors can transform the look and feel of a room—adding depth, function, and a signature style that reads like design intent rather than an afterthought. Start with a single piece, refine the behavior, and scale to a coherent, smart-lit home.
Visit XENTAR for more lighting, decor & furniture curated for modern homes and creative spaces.


Share:
How to Make Modular Furniture Look Custom: Smart Ambient Lighting Blueprints for Tiny Apartments
Seamline Lighting: Floor-to-Ceiling LED Seams & Sensor Scenes That Make Modular Furniture Feel Built-In in Micro-Apartments