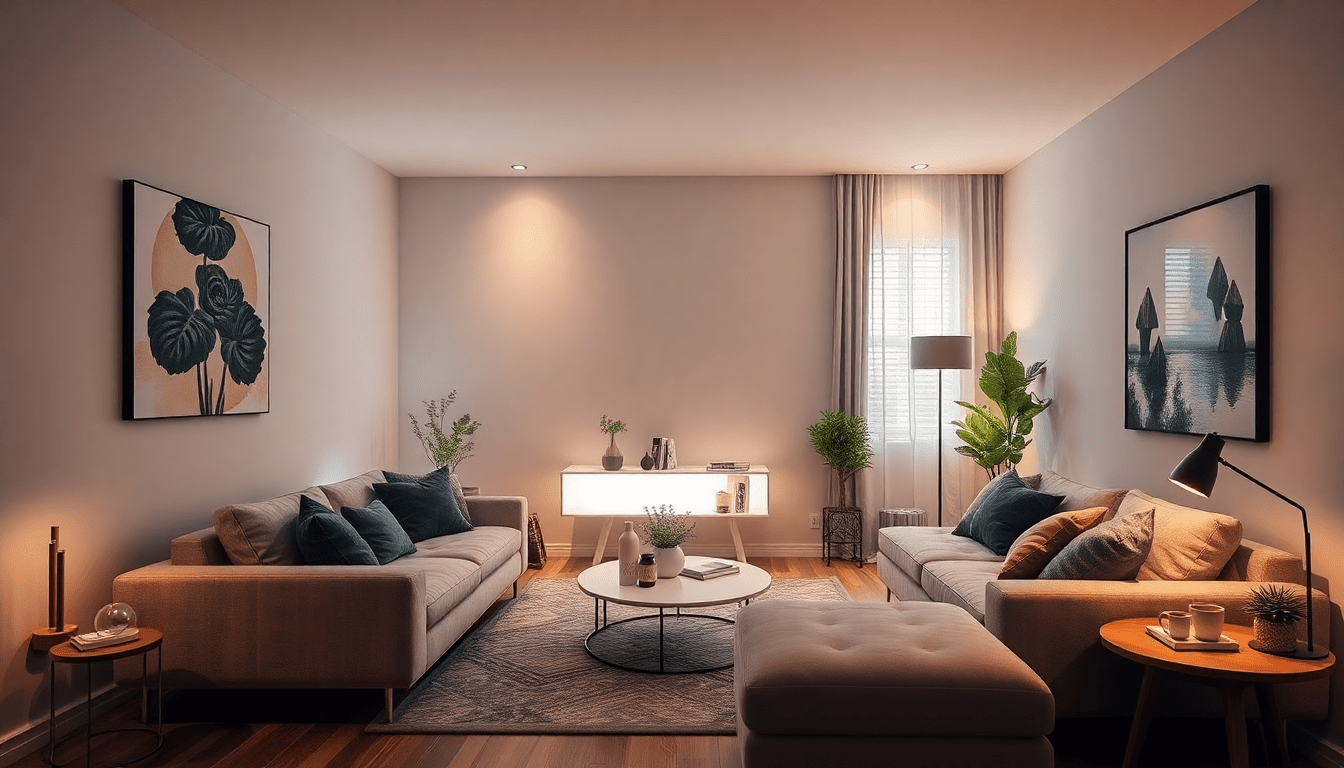
Introduction: why smart lighting maps are a game-changer for small spaces
Small homes and micro-apartments are defined by flexible, modular furniture that changes function throughout the day. Smart lighting maps—virtual zone plans driven by sensors—ensure your lighting adapts to those changes, not the other way around. This article walks through the design, technology, and practical steps to implement sensor-driven zones that make modular furniture work harder and smarter.
How sensor-driven lighting maps solve common small-home lighting problems
- One-size-fits-all lighting fails: Overhead fixtures often provide uniform light that’s inappropriate for evolving activities (work, sleep, dining).
- Temporary layouts confuse static systems: A lamp or switch in one configuration may be useless after you rearrange a modular sofa or lower a Murphy bed.
- Energy waste: Lights left on in unused parts of a small home still add to bills and heat load.
- Lack of comfort and focus: Improper light levels and color temperatures reduce productivity and comfort; they also affect sleep.
Core concept: what is a smart lighting map?
A smart lighting map is a digital floorplan decomposition into sensor-driven zones. Each zone has rules (when it turns on/off, brightness, color temperature, and scenes) that react to sensor inputs such as motion, occupancy, ambient light, or furniture position. Smart maps are dynamic: as your modular furniture changes mode, the map’s zones follow the active space.
Benefits for modular furniture in small homes
When lighting is mapped to activities and furniture states, small spaces behave like larger, dedicated rooms without adding square footage. Key benefits include:
- Activity-first lighting: Light follows the task—work, relax, cook—regardless of the room’s current layout.
- Fewer fixtures, smarter use: Less reliance on multiple portable lamps; one set of fixtures covers many uses.
- Improved sleep and circadian support: Tunable white lights can shift color temperature automatically to align with the day.
- Energy efficiency: Zoned control and motion triggers can reduce energy use by 30–60% compared to always-on solutions.
- Cleaner aesthetics: Reduced clutter from portable lamps and cords keeps modular furniture arrangements sleek.
Designing your lighting map: a detailed, practical workflow
Follow this step-by-step design and implementation guide to create a robust lighting map for your small-home setup.
-
Step 1 — Audit furniture modes:
- List common furniture states (e.g., living mode, workspace, dining, sleeping).
- Sketch the floorplan for each state and note required task areas and sightlines.
-
Step 2 — Define activities and ideal light levels:
- Assign lux targets and color temperatures by activity (work: 400–600 lux, 4000–5000K; reading: 300–500 lux, 2700–3500K; ambient relaxation: 100–300 lux, 2200–3000K).
- Consider layered lighting—ambient, task, and accent—for each mode.
-
Step 3 — Map zones:
- Create overlapping virtual zones: "work island," "dining bay," "sleep oasis," and "transition path." Overlap lets a single lamp serve multiple zones with different scenes.
-
Step 4 — Select sensors and placement:
- Choose motion/PIR sensors for paths and general occupancy, ultrasonic or presence sensors for desk or sofa zones, and contact sensors for moving elements like tables and Murphy beds.
- Place sensors to minimize blind spots, avoid HVAC drafts, and account for typical movement patterns.
-
Step 5 — Create automation rules:
- Define triggers (sensor activation, time of day, furniture position) and actions (scene activation, dim levels, color temperature shifts, delays).
- Include hold/timeout rules that prevent flicker or false triggers—e.g., introduce a 15–30s confirmation window for hall pathlights, 10–20 minute inactivity timeouts for work areas.
-
Step 6 — Build and test incrementally:
- Start with one zone and one or two sensors; iterate based on real-world use. Tweak sensitivity and lux thresholds to match behavior patterns.
Sensor types, selection, and advanced placement tips
Choosing the right sensors and placing them properly is crucial for reliable automation.
- Passive Infrared (PIR): Detects heat and motion across a plane. Good for corridors, entry points, and general room occupancy. Mount at 6–8 feet for optimal coverage. Avoid pointing at windows or vents.
- Ultrasonic sensors: Detect micro-movements, ideal for desks or couches where occupants sit still for long periods. These can be sensitive—use in smaller zones.
- Dual-technology sensors: Combine PIR and ultrasonic for fewer false positives and better coverage in complex zones.
- Ambient light (lux) sensors: Prevent unnecessary activation by measuring daylight. Integrate with daylight harvesting rules.
- Contact sensors: Attach to fold-away furniture, sliding partitions, or cabinet doors to trigger layout-specific scenes.
- Pressure or mat sensors: Useful under rugs or seating for discreet occupancy detection in a modular sofa or bedside area.
-
Placement tips:
- Use multiple sensors to avoid blind spots in asymmetric rooms.
- Test at different times and furniture states—place temporarily with adhesive mounts before committing to wiring.
- Consider sightlines: sensors that can see the activity area clearly will be more reliable than sensors blocked by furniture.
Automation and scene ideas tailored to modular living
Scenes and rules are the heart of a responsive system. Below are robust, SEO-friendly scene templates you can adapt.
- Dynamic work scene: Activates when desk occupancy is detected. Set lights to 400–600 lux and 4000–5000K; enable task lamp and reduce ambient to 30% to minimize glare. Add a 20-minute inactivity timeout.
- Convertible dining/work table scene: When contact sensor shows the table unfolded, enable seat-facing pendant at dining brightness and switch to warm 2700K for meals, or cool 3500–4000K for focused work.
- Murphy-bed sleep mode: Contact sensor on the bed triggers warm, low-level bedside lights (2200–2700K) and turns off ceiling fixtures or dims them to 10% for pre-sleep wind-down.
- Path and night lighting: Motion-activated low-level LEDs (10–20 lux, 2200–2700K) along floor or baseboards with a short, fast-on delay to avoid startling residents.
- Welcome scene: Entry motion + ambient lux below threshold triggers bright ambient and accent lighting for 2–5 minutes, then relaxes to normal level.
- Sunlight-adaptive scenes: Use lux sensors or sunrise/sunset scheduling to prioritize daylight—lights only ramp up when ambient drops below target lux levels.
Technical integration: protocols, controllers, and interoperability
2025 is an era of greater interoperability thanks to Matter, but building the right ecosystem still matters.
- Protocols: Zigbee and Z-Wave remain popular for low-power mesh networks; Wi-Fi is convenient for cameras and high-bandwidth devices; Thread and Matter are growing for robust, interoperable smart home setups.
- Matter: Offers cross-brand compatibility—prioritize Matter-enabled bulbs, sensors, and controllers where possible to future-proof your setup.
- Hubs and bridges: Use a central controller (e.g., a Matter controller, Home Assistant hub, or a manufacturer bridge) to coordinate sensors, bulbs, switches, and rules engines.
- Apps and scripting: Consumers will appreciate simple scene editors, while advanced users can use Home Assistant, Node-RED, or scripting APIs to implement complex conditional logic and sensor fusion.
- Local vs cloud processing: Local automation reduces latency and dependency on the cloud—prefer controllers that run automations locally for critical scenes like pathlighting.
Wired vs. wireless: installation and power options
- Wired (hardwired) sensors: Ideal for permanent installations—more reliable and avoid battery replacements. Often used with smart switches or occupancy sensors at light circuits.
- Battery-powered sensors: Best for renters or temporary testing. Choose long-life battery models and plan a replacement strategy.
- Power over Ethernet (PoE): Emerging option for LED fixtures and sensors—offers centralized power and network connectivity with minimal floor clutter.
- Low-voltage LED drivers: Use for integrated modular lighting systems to keep power and control centralized.
Energy, comfort, and safety: quantifying the impact
Smart lighting maps deliver measurable benefits:
- Energy reduction: Typical savings range from 30% to 60% compared to always-on fixtures, depending on occupancy patterns and daylight integration.
- Peak demand reduction: Dimming and selective activation lowers instantaneous power draw, helping with utility demand charges in some markets.
- Sleep and wellbeing: Tunable white that reduces blue light in the evening can improve sleep quality and align circadian rhythms.
- Accident prevention: Motion-activated pathlighting can reduce nighttime falls, an important safety benefit for older adults.
Real-world case studies and layout examples
Below are three detailed scenarios showing how lighting maps support modular furniture in small homes.
-
Case study 1 — 320 sq ft studio with Murphy bed:
- Problem: Bedroom and living room share the same footprint; Murphy bed blocks a ceiling fixture when deployed.
- Solution: Contact sensor on bed triggers "sleep" scene: bedside wall sconces become primary light (warm 2200–2700K), overhead dims off, pathlight remains active for night trips. Day scene returns to cool, brighter ambient and activates wall-mounted task lights for desk area.
- Result: 40% reduction in evening energy use and better night comfort without changing furniture layout.
-
Case study 2 — Micro-loft with pivoting sofa/desk:
- Problem: Sofa swivels to create a living area or faces a desk for work; single overhead doesn't support both.
- Solution: Use occupancy sensors at the desk and sofa and assign two overlapping zones. When desk presence detected, task pendant and desk lamp to 500 lux; when sofa presence detected, produce a warm, dim theater-style scene that only lights the media wall.
- Result: Seamless transitions and fewer portable lamps; user satisfaction increased because lighting matched activity within 5 seconds of movement.
-
Case study 3 — Tiny house with sliding partitions:
- Problem: Sliding panels reconfigure sleeping and living areas, creating transient zones that conventional wiring can’t follow.
- Solution: Place contact sensors on panels and use multiple motion sensors. Panel position triggers which sensor set is active and which scenes to follow.
- Result: Lighting follows the active room configuration, reducing setup friction and enabling flexible entertaining modes.
Product recommendations and budget scenarios (2025)
Choose products by protocol preference and whether you need Matter compatibility. Below are categories with examples and approximate budgets.
-
Starter budget (under $300):
- IKEA TRADFRI motion sensor + LED tunable bulbs (basic app control). Good for testing zones.
- Approximate cost: $100–$300 depending on number of bulbs and sensors.
-
Mid-range ( $300–$900):
- Philips Hue Bridge + motion sensors + tunable white bulbs, or Aqara sensors with a Matter-capable hub.
- Home Assistant on a Raspberry Pi for advanced automations.
- Approximate cost: $400–$900 for robust setup covering a studio.
-
Premium ( $900+ ):
- Lutron wired occupancy sensors, bias lighting, PoE fixtures, and Matter-enabled commercial-grade tunable fixtures for integrated installations.
- Professional install recommended for wiring and custom layout calibration.
- Approximate cost: $900–$3000 depending on fixtures and installation.
Installation checklist: what to prepare before you start
- Measure and draw accurate floorplans for each modular furniture mode.
- Decide on protocol (Matter, Zigbee, Z-Wave, Wi‑Fi) and pick a compatible hub/controller.
- Choose sensors and test placement with temporary mounts.
- Map power needs and decide wired vs battery sensors.
- Document automation rules and test them in controlled steps.
- Label devices in your hub so zones are easy to manage and debug.
Accessibility, UX, and aesthetics: designing for people
Design smart lighting with human needs in mind, especially in tight spaces where comfort matters most.
- Avoid abrupt bright lights at night: Use warm color temps and gentle fade-ins for night scenes to avoid disrupting sleep cycles.
- Consider motion sensitivity for neurodiverse users: Tunable sensitivity or manual override switches help prevent overstimulation.
- Make overrides easy: Physical switches, voice commands, and quick-access app scenes are essential for a positive UX.
- Maintain visual cohesion: Match fixture styles and finish to the furniture aesthetic—sleek, minimal fixtures pair well with modular, Scandinavian, or industrial furniture.
Maintenance, troubleshooting, and scaling
- Battery management: Track replacement intervals for battery sensors; choose long-life models and schedule reminders in your calendar or hub.
- False triggers: Adjust sensitivity, reposition sensors away from vents and windows, and use logical AND conditions (e.g., motion + low ambient) to reduce errors.
- Network resilience: For larger systems, use a dedicated smart-home network or mesh to prevent Wi‑Fi congestion.
- Scaling: Start small—add zones and scenes gradually as you learn usage patterns and occupant preferences.
Cost vs. ROI: how to justify the investment
Smart lighting maps are an investment in convenience, wellbeing, and energy. Typical payback horizons vary:
- Energy savings alone can justify mid-range systems in 2–5 years depending on local electricity costs and usage patterns.
- Added value comes from improved sleep, higher home enjoyment, and potential property value uplift due to smart home features.
Emerging trends and the future of sensor-driven lighting
- AI-driven predictive scenes: Systems will learn user routines and predictively ready spaces before people arrive in a zone.
- Sensor fusion: Combining camera-free approaches (radar, mmWave) with occupancy and furniture state sensors for highly reliable detection without privacy tradeoffs.
- Matter and cross-brand ecosystems: Wider adoption will simplify mixed-brand setups and make upgrades less painful.
- Integrated modular fixtures: Furniture and lighting will be designed together—embedded sensors and wiring channels in modular pieces will streamline setup.
Sample step-by-step setup for a 350 sq ft studio
This practical example shows an end-to-end approach you can replicate.
- Layout: Entry/kitchen along one wall, modular sofa that converts to a bed, fold-down dining table, small desk area.
-
Devices:
- 2 x PIR motion sensors (entry and central)
- 1 x ultrasonic presence sensor (desk)
- 1 x contact sensor (Murphy bed)
- 3 x tunable white bulbs for ceiling fixtures
- 1 x tunable pendant over the table
- 1 x smart hub (Matter-capable) or Home Assistant controller
-
Automation:
- Entry motion + lux < 150 lux -> Welcome scene (ambient 60% for 3 minutes)
- Desk presence -> Work scene (desk 500 lux, ambient 30%)
- Murphy bed down -> Sleep scene (bedside warm lights 10–30%, overhead off)
- Path motion at night -> floor LEDs at 15 lux for 90s
- Test & refine: Run the system for 2 weeks, adjust sensor sensitivity, timeouts, and lux thresholds based on behavior.
Conclusion
Smart lighting maps convert static fixtures into an adaptive, activity-aware system that complements modular furniture and small-home living. By planning zones, choosing the right sensors, and building thoughtful automation rules, you can transform a tiny footprint into a highly functional, comfortable environment that feels larger than it is. Start small, iterate, and prioritize human comfort and accessibility as you scale.
Visit XENTAR for more lighting, decor & furniture curated for modern homes and creative spaces.


Share:
Lighting That Moves With Your Furniture: Dynamic Smart Lighting Designs to Enhance Multifunctional Small Spaces
Furniture-Responsive Smart Lighting: Trackable LEDs and Automated Scenes to Expand Multifunctional Small Spaces