Introduction: Brief, Meta-Friendly Summary
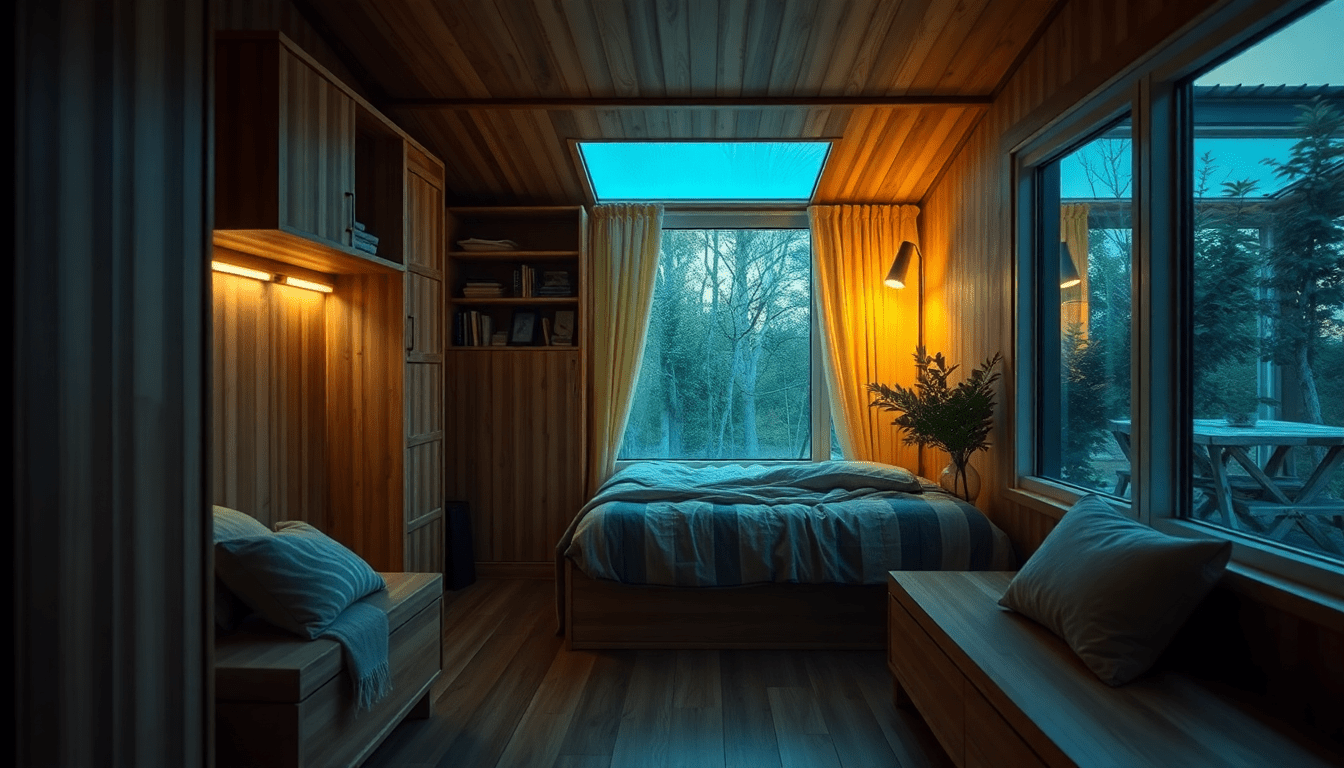
Microhomes require a precise visual language: lighting that defines function, supports mood, and hides mechanical complexity. Smart light grammar — the rules that link sensors, luminaires, and furniture states — turns foldaway furniture into apparent built-ins with minimal visual friction.
What Is "Smart Light Grammar" and Why It Matters in Microhomes
Smart light grammar is the vocabulary and syntax of lighting design and automation: how ambient washes, task cues, accent highlights, and sensor logic combine to communicate room function. In compact spaces, that grammar must be explicit because there is little room for ambiguity. Properly implemented, it:
- Signals zone function instantly (sleep, work, dine, circulate).
- Makes foldaway furniture read as architecture through consistent light lines and behavior.
- Reduces cognitive load: the home feels intuitive and responsive.
- Saves energy by lighting only what’s needed when it’s needed.
Microhome Typologies and Lighting Challenges
Not all microhomes are the same. Lighting strategies must reflect typology and occupant lifestyle.
- Studio micro-apartments: one multipurpose volume—emphasize clear scene-based lighting and soft transitions.
- Micro-lofts: variable ceiling heights—use vertical layering and concealed uplights.
- Tiny houses (mobile): vibration and weight constraints—favor low-voltage, flexible wiring and durable connectors.
- Co-living micro-units: privacy cues and shared zones—use personal controls and localized sensors.
Start Right: Measurement, Goals, and Lux Targets
Design starts with measurement and clear functional goals. Use a lux meter and document these targets, because sensor thresholds and driver outputs need real numbers.
- Circulation/path: 10–50 lux
- General ambient: 100–200 lux
- Reading/bedside: 150–300 lux
- Desk/task: 300–750 lux (aim higher for detailed work)
- Kitchen prep/dining surface: 300–500 lux
- Cabinet/closet interiors: 50–200 lux
Document natural daylight levels at different times and use this to configure daylight harvesting rules.
Mapping Furniture States to Lighting Scenes
The key to seamless foldaway integration is mapping discrete furniture states to lighting behavior. Typical states:
- Stowed: furniture is hidden; lighting emphasizes architecture and circulation.
- Deploying/transitioning: progressive reveal lighting ramps to reduce glare and guide movement.
- Deployed/active: task and comfort lighting is prioritized; surrounding ambient is optimized.
- Maintenance/cleaning: brighter, uniform lighting for access and visual inspection.
Each state should correspond to a scene: a preconfigured set of intensities, color temperatures, and active sensors.
Sensors: Types, Placement, and Best Uses
Choose sensors to match motion type and mechanical motion of the furniture. Sensor selection and placement are critical in small spaces where false triggers are common.
- PIR (Passive Infrared)
- Best for general occupancy detection in living zones.
- Place to avoid direct line of travel from a bed or sofa to reduce false triggers from breathing or small movements.
- Microwave/dual-tech
- Good for detecting movement behind glass or thin partitions; pair with PIR to reduce false positives.
- Contact/magnetic and reed switches
- Simple and reliable for 'stowed vs deployed' detection on wall beds, foldaway tables, and cabinet doors.
- Tilt/accelerometer sensors
- Provide progressive state info (hinge angle) so lighting ramps correlate with how far a piece is opened.
- Ambient light (lux) sensors
- Enable daylight harvesting and prevent redundant lighting when natural light is sufficient.
- Capacitive proximity sensors
- Allow touchless activation of hidden compartments and switches without visible hardware.
Sensor Placement Rules for Microhomes
- Mount motion sensors at 1.8–2.4 m (6–8 ft) for wide coverage; adjust height if ceiling is low.
- Aim PIR sensors away from heat sources and direct sunlight to avoid false triggers.
- Place contact sensors on the fixed and moving frames of foldaway furniture to detect closure precisely.
- Install lux sensors near the room center or by windows to get representative daylight readings; refine with secondary sensors in deep-plan units.
- Use tilt sensors on the moving element hinge to enable progressive lighting based on opening angle.
Lighting Fixtures & Optical Strategies
Fixture choice and optics determine how a foldaway piece reads visually.
- Linear LED strips and recessed profiles
- Create continuous light lines that visually anchor a foldaway unit to the architecture.
- Use diffusers to avoid hot spots and visible LED dots.
- COB and high-density LED modules
- Offer uniform output with minimal glare—good for hidden headboards and backlit panels.
- Adjustable spotlights and narrow-beam optics
- Provide task pointing for desks and dining surfaces when deployed.
- Uplights and cove lighting
- Soften vertical surfaces and visually fuse furniture with walls or ceilings.
- Edge-lit panels and lightguides
- Excellent for hiding seams while providing uniform face illumination for cabinet fronts.
Color Temperature, CRI, and Circadian Considerations
- Tunable white: 2700K–3000K for evening relaxation; 3000K–4000K for productive tasks. Automate CCT shifts by time and activity.
- CRI ≥90 is recommended for accurate color rendition in small interiors where finishes matter.
- Circadian-friendly controls: reduce blue content after sunset and use warmer light to cue winding down in sleep areas.
Wiring & Mechanical Integration for Moving Furniture
Embedded lighting in foldaway furniture requires thoughtful routing and durable mechanical interfaces.
- Low-voltage distribution (12V/24V DC) is safer and simplifies driver placement. Keep drivers in fixed cabinet sections or external service panels.
- Use flexible flat cables, continuous cable chains, or conduit through hinge points. Provide generous service loops and strain relief.
- Quick-disconnect plugs allow furniture removal without rewiring and simplify repairs in tight microhome spaces.
- Protect cabling from pinch points and ensure minimum bend radius of LED strips and cables is respected.
- Consider slip ring assemblies for rotational elements where continuous rotation is expected (less common in foldaways but relevant for some bespoke solutions).
Drivers, Dimming, and Flicker Control
- Choose drivers with smooth dimming curves (analog, DALI, 0–10V, or digital protocols like DMX depending on complexity).
- PWM frequency should be high enough to avoid visible flicker and interactions with camera sensors—choose drivers operating >1 kHz where possible.
- For tunable white, use drivers that integrate both color channels with coordinated dimming to avoid color shifts during level adjustments.
Control Protocols: Local vs Cloud, Matter, and Interoperability
Pick a control approach that balances reliability, latency, privacy, and extensibility.
- Local hub (Zigbee, Z-Wave, Thread/Matter): lower latency, works offline, ideal for safety-critical automations like path lights at night.
- Wi‑Fi devices: easy setup and abundant options but may be less reliable during network outages.
- Matter: emerging standard that unifies devices across ecosystems—choose Matter-compatible devices if future-proofing is a priority.
- Bluetooth Mesh: useful for small-scale installations with direct control from phones; consider range and device availability.
- Hybrid designs: local automation for core scenes, cloud for remote control and analytics.
Automation Rules and Example Scene Library
Translate furniture states into clearly defined automation rules. Below are sample scenes and logic to use as templates.
- Night Path
- Trigger: motion detected between 23:00–06:00 OR bed deployed with low-light condition.
- Action: path lights at 10–20 lux; main ambient at 0–20%.
- Workspace Focus
- Trigger: desk deployed AND ambient lux below target AND occupant present.
- Action: tunable white to 4000K, desk task light at 500 lux, peripheral ambient at 100 lux.
- Seamless Sleep
- Trigger: wall bed deployed OR manual sleep command; time > 20:30.
- Action: warm 2700K bedside at 150 lux, circadian dimming to 10% after 22:30, disable nonessential motion triggers.
- Dining Reveal
- Trigger: foldaway table unfolded OR contact sensor closed.
- Action: focused pendant/linear over table to 300–500 lux, ambient dims to 60% to create contrast.
- Progressive Reveals
- Trigger: hinge angle sensor during open/close.
- Action: map hinge angle to lighting level (0% at closed, 80% at 90deg) with 200–500 ms smoothing to avoid strobing.
Human Factors and UX: Making Automation Feel Natural
- Predictability: automation should behave consistently; avoid random brightness or unannounced color shifts.
- Manual overrides: always provide an easy, local override (physical switch, touch strip, or capacitive zones) for immediate control.
- Feedback: use subtle audible or light cues during transitions to indicate furniture state (e.g., a short dim/bright pulse when a bed is fully stowed).
- Personalization: allow occupant presets—different users often prefer different lux and color temperature settings.
Sustainability and Energy Optimization
- Daylight harvesting: lower artificial lighting levels automatically when natural light is available, saving energy.
- Motion/occupancy control: limit active lighting to occupied zones, but avoid excessively short timeouts that cause constant switching.
- LED selection: high-efficacy LEDs (≥100 lm/W) and local dimming save energy over incandescent or halogen fixtures.
- Power budgeting: in mobile tiny houses, calculate total inrush currents and steady-state draw to size batteries and inverters properly.
Seasonal Tuning & Adaptive Behavior
Adjust light grammar to seasonality and changing daylight hours to preserve comfort and circadian alignment.
- Summer: longer daylight harvesting windows; favor cooler midday color temperatures for alertness.
- Winter: extend warm evening scenes earlier; compensate for shorter daylight with higher ambient levels during daytime activities.
- Holiday/guest modes: provide temporary presets that increase brightness and hospitality cues for visiting friends or family.
Commissioning: Calibrate, Test, and Iterate
Proper commissioning ensures the system behaves as intended in real conditions.
- Calibrate lux thresholds with occupants present and typical furnishings in place.
- Test sensors for false triggers and blind spots; refine placement and coverage.
- Fine-tune dimming curves and scene tempi: avoid abrupt snaps during door/beds opening.
- Document the final setup: sensor locations, thresholds, scene definitions, and override locations for future troubleshooting.
Maintenance and Long-Term Reliability
- Design for service: keep drivers accessible, use modular wiring, and label connectors inside cavities.
- Battery management: for battery-powered sensors, provide service intervals (6–12 months) and easy access panels for replacement.
- Firmware updates: schedule periodic updates for hubs and smart fixtures to maintain security and interoperability.
- Spare parts: include spare connectors, quick-disconnects, and an extra length of LED strip in a service pocket within a built-in.
Accessibility & Safety Considerations
- Ensure path and egress lighting is always available during night hours and is locally overrideable.
- Implement fail-safes: if sensor data is inconsistent, revert to safe defaults (e.g., low-level path lighting).
- Provide tactile or audible cues for occupants with visual impairments to indicate furniture state or activation.
- Adhere to local electrical codes and consult professionals for fixed mains wiring and driver installations.
Budgeting: Typical Cost Bands and Trade-Offs
Costs will vary by complexity, component quality, and whether you DIY or hire professionals.
- Basic DIY setup (under $500)
- Entry-level LED strips, motion sensors, smart plugs, and Wi‑Fi controllers. Good for simple stowed/deployed scenes.
- Mid-range system ($1,500–$5,000)
- Higher CRI LEDs, tunable white drivers, local hub (Zigbee/Thread), contact sensors, and professional commissioning for one microhome.
- High-end integrated system ($5,000+)
- Custom recessed profiles, COB modules, Matter-compatible ecosystem, advanced shading/daylight controls, and full professional integration.
Case Studies & Practical Examples
Real-world examples help translate principles into practice.
- Studio Conversion: A 28 m2 studio used magnetic reed switches on a Murphy bed, tilt sensors on a convertible desk, and Z‑Wave lighting. The system ramped bedside lights based on bed angle and used daylight harvesting to reduce evening ambient by 25% annually.
- Tiny House on Wheels: Low-voltage 24V distribution with quick-disconnects for mobile stability. Tilt sensors and contact switches enabled progressive reveal lighting; power budgeting proved essential for off-grid solar sizing.
- Co-Living Micro-Unit: Shared corridor lighting centralized on a Thread hub with privacy-preserving PIRs in personal units. Occupants had personal presets stored on their phones and a manual key panel for overriding building scenes.
Product Selection Tips
- Prioritize CRI and lumen density over low-cost lumen claims. In microhomes, perceived quality of light outweighs raw output.
- Choose driver vendors who provide dimming specs, PWM frequency, and temperature derating curves.
- Buy sensor samples and test placement before committing to large purchases—microhome geometries are unforgiving.
- Select controllers that support local automation and have robust offline behavior to maintain night safety scenes without internet.
Common Pitfalls and How to Avoid Them
- Too many overlapping sensors: leads to erratic behavior. Use simple, clearly prioritized detection rules.
- Ignoring maintenance access: hiding drivers and connectors behind non-serviceable panels creates future cost and downtime.
- Over-automation: aggressive occupancy timeouts cause annoyance. Opt for conservative defaults and adjustable timeouts.
- Inconsistent color temperature: mismatched fixtures make foldaway furniture stand out. Standardize on CCT and CRI across the system.
Sample Installation Workflow (Step-by-Step)
- Survey & measure: floor plan, ceiling heights, daylight, furniture travel paths.
- Define scenes and lux targets per furniture state and room use.
- Select sensors & fixtures; draft wiring and driver locations with service access in mind.
- Install low-voltage distribution and secure drivers in fixed cavities; route flexible cables through hinges with strain relief.
- Mount sensors, program initial automation rules, and set up local hub or controller.
- Commission: calibrate lux thresholds, tune motion sensitivity, and refine dimming curves with occupants present.
- Document the system and provide user training on manual overrides and presets.
FAQs: Quick Answers to Common Questions
- Q: Can I retrofit lighting into an existing foldaway bed?
- A: Yes—use low-voltage LED strips, magnetic contact sensors, and flexible wiring. Ensure driver placement is in a fixed, ventilated area.
- Q: Are cameras necessary for presence detection?
- A: No. Prefer non-imaging sensors (PIR, radar, contact) for privacy and reliability in residential microhomes.
- Q: How do I prevent lights from turning on during minor movements in bed?
- A: Use contact or tilt sensors to control bed state and program motion sensors with higher thresholds or occupancy timeouts for living areas.
Conclusion: Make Foldaway Furniture Feel Permanent with Intentional Light Grammar
Smart light grammar turns foldaway furniture into convincing built-ins by aligning visual cues with mechanical states. The process combines careful measurement, sensor selection, thoughtful wiring, and robust control logic. Use progressive reveals, consistent color temperature, and layered lighting to hide mechanical complexity and highlight function. When done right, microhomes become intuitive, adaptable, and beautiful—spaces that feel bigger and act smarter.
Visit XENTAR for more lighting, decor & furniture curated for modern homes and creative spaces.


Share:
Smart Ambient Lighting Anchors: Psychology-Backed Scene Recipes & Sensor Placement to Make Convertible Furniture Feel Built-In in Small Homes
Perceived Permanance Lighting: Smart Layers & Sensor Scenes That Anchor Multifunctional Furniture in Small Spaces