Why Lightcraft Matters in Tiny Homes
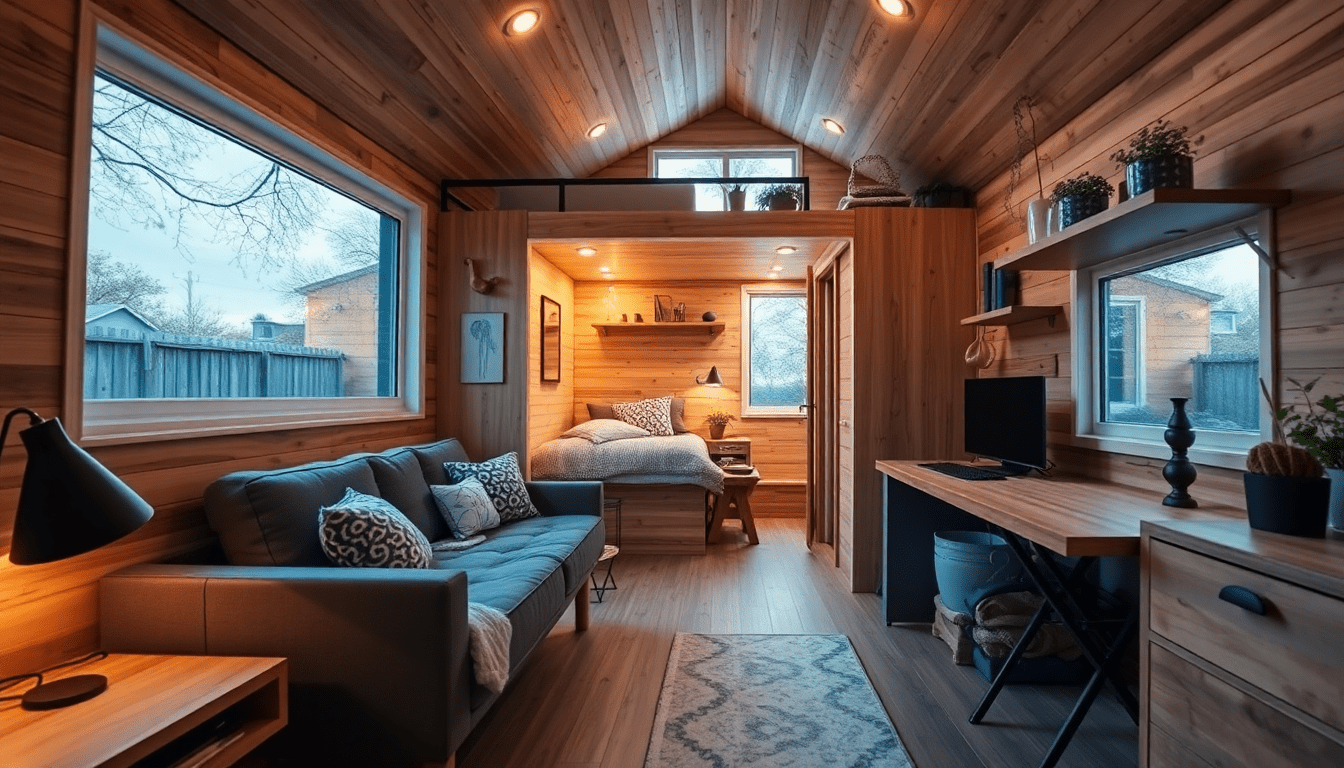
Tiny homes compress living functions into compact footprints. That compression magnifies the impact of lighting decisions: the right light makes spaces feel larger, supports multiple activities, and enhances safety around moving furniture. Lightcraft — the thoughtful design and control of layered lighting — becomes essential in tiny homes because it ties illumination directly to the state of convertible furniture and occupant behavior. The result: seamless transitions between daily modes (sleep, cook, work, entertain) without manual intervention, reduced energy use, and a more delightful, lived-in environment.
Meta-friendly intro
Optimize tiny home living with sensor-guided layered lighting that adapts to convertible furniture for comfort, safety, and style.
Tiny Home Lighting Challenges and Opportunities
- Multi-function spaces: One corner may be a workspace by day and a bedroom by night — lighting must support both.
- Limited real estate: Fixtures must be low-profile and often integrated into furniture or structure.
- Power constraints: Many tiny homes are off-grid or use limited service, requiring energy-efficient strategies.
- Mechanical complexity: Convertible furniture introduces moving parts; wiring and sensors must tolerate motion and wear.
- Human comfort: Tunable white, glare control, and night-safe navigation lighting are critical for wellbeing in small spaces.
Core Principles of Sensor-Guided Layering
- Design by states: Map the home’s modes (e.g., sleep, cook, work, dine) and design lighting scenes for each state.
- Layer illumination: Use ambient, task, accent, and safety lighting so each activity has the right intensity and color temperature.
- Sensor-first thinking: Prioritize sensors that detect furniture position and presence to trigger scenes automatically.
- Fail-safe manual control: Always provide easily accessible manual overrides and simple physical switches for reliability.
- Minimize moving wiring: Use wireless sensors, flex-rated cables, and centralized controllers to reduce failure points across hinges.
- Energy-aware design: Combine occupancy logic, dimming, and efficient LEDs to keep power use predictable and low.
Understanding Sensor Types and Where to Use Them
Choosing the right sensors and placing them correctly is the backbone of reliable, intuitive lightcraft. Below are the sensor categories, strengths, and practical placement tips.
-
PIR (Passive Infrared)
- Best for: detecting human presence in open sight-lines (lofts, living areas).
- Limitations: struggles with small or slow movements; line-of-sight required.
- Placement tip: mount on ceilings angled to cover the movement pattern without pointing directly at windows.
-
Ultrasonic / Microwave
- Best for: detecting subtle motion in zones with obstructions or where PIR fails (behind furniture or curtains).
- Limitations: may be more prone to false triggers from pets; choose models with pet immunity settings.
- Placement tip: use above convertible furniture or in small alcoves where PIR is inconsistent.
-
Contact / Reed Switches & Magnetic Sensors
- Best for: detecting whether a fold-down bed, slide-out table, or cabinet is opened or closed.
- Limitations: require alignments; magnets can shift over time — periodic checks recommended.
- Placement tip: install on frame edges where the magnet and sensor meet cleanly when closed.
-
Hall-effect & Proximity Sensors
- Best for: compact detection in tight spaces and durable sensing on moving panels.
- Placement tip: place on sliding or rotating elements where a non-contact sensor can detect position reliably.
-
Accelerometers / Tilt Sensors
- Best for: measuring angle changes in articulating furniture (reclines, hinges).
- Placement tip: mount directly on the moving member for accurate angle-based scene triggers.
-
Pressure Sensors / Load Cells
- Best for: detecting occupancy on benches, mattresses and seats.
- Placement tip: embed under upholstery or cushion foam; calibrate for minimum detectable weight to avoid false positives from stored items.
-
Ambient Light Sensors
- Best for: dynamically adjusting brightness / color temp to daylight and avoiding overlighting.
- Placement tip: place where sensor measures representative light levels for the room, not directly exposed to sun glare.
Layered Lighting Breakdown — Targets and Tuning
Use the following lighting targets as design starting points. Fine-tune with a lux meter or smartphone app for best results.
- Ambient (General): target 150–300 lux for living areas — soft, even illumination that reads materials and supports casual tasks.
- Task: 300–600 lux for food prep, reading, or focused work; use directional fixtures or adjustable task lighting.
- Accent: lower intensity highlights (50–150 lux) to create depth and separate visual planes.
- Safety / Night: 5–50 lux for navigation lights and floor guides to reduce disturbance during sleep.
- Color Temperature: 2700–3000K for relaxing zones (bed, lounge) and 3500–4000K for active tasks; tunable white systems allow dynamic transitions tuned to time of day.
- CRI: choose LEDs with CRI 90+ for accurate color rendering of finishes and textiles in a small space.
Designing Scenes for Convertible Furniture — Detailed Use Cases
Each furniture state should correspond to a lighting scene. Below are thorough, real-world recipes for common convertible elements in tiny homes.
Murphy Bed (Wall Bed) — Smooth Sleep Transitions
- Sensors: magnetic contact at top and bottom of the bed frame; pressure sensor in mattress optional for occupancy.
- Lighting Goals: create a calming sleep scene when bed is down; provide safe navigation to bathroom at night; ensure daytime living light is restored when bed is up.
-
Scene Recipe:
- Bed Deploys (contact closed): fade overhead ambient to 20–30% over 400 ms; set tunable white to warm 2700K.
- Enable bedside LED strips or wall sconces at 10–40 lux with directional shielding to avoid glare.
- If pressure sensor detects occupancy: enable night guidance (floor toe-kicks at 5–20 lux) and engage sleep-mode disabling bright task lights.
- Bed Stored (contact open): restore ambient to daytime presets (3500K, 100–200 lux depending on zone).
- Edge Cases: include a manual override switch for quick returns to previous scene, and a timeout to prevent repeated toggles from intermittent contact alignment issues.
Fold-Out Dining Table — Focused Eating Mode
- Sensors: hinge-mounted position sensor; occupancy sensor under the bench or chair pressure sensors.
- Lighting Goals: concentrate light on the table surface while reducing visual clutter elsewhere; minimize shadows and glare on plates.
-
Scene Recipe:
- Table Opens: activate focused pendant or directional track fixture over table at 300–500 lux; set color temperature to neutral-warm 3000–3500K.
- If seats are occupied: raise table light to full; if unoccupied after 10 minutes, dim to 30% then off at 30 minutes.
- Fold Table: quickly cue down table light and re-activate ambient and accent layers for the living configuration.
Slide-Out Counter / Workspace — Productive, Immediate Light
- Sensors: linear position sensor on slide; ambient light sensor to prevent overbright conditions when sunny.
- Lighting Goals: bright, shadow-free task light for food prep or laptop work; reduce blue light exposure in evenings.
-
Scene Recipe:
- Counter Extended: turn on under-cabinet task light to 400–600 lux; set to neutral 3500–4000K during daytime productivity hours.
- Evening Hours: automatic warmer setting (2700–3000K) and lower intensity to reduce alerting blue light.
Bench Seating with Hidden Storage — Smart, Short-Duration Lighting
- Sensors: reed switch or micro-contact inside lid; small PIR inside storage for longer open states.
- Lighting Goals: provide immediate illumination to find stored items and automatically turn off to save power.
-
Scene Recipe:
- Storage Open: activate interior LED strips at 100% for 60–90 seconds, then fade to off unless the storage remains opened.
- Detect Motion Inside (PIR): keep light on while activity detected and shut off 30s after no motion.
Sensor Logic & Automation Patterns — Practical Rules to Program
Program simple, resilient automation rules that account for state changes, user intent, and false triggers. Keep logic readable and use hysteresis where needed.
- State-first priority: furniture-state sensors (contact, tilt) should override occupancy sensors to ensure immediate mode transitions when furniture moves.
- Vacancy turn-off: use occupancy sensors to turn off lights after a configurable delay (e.g., 1–5 minutes) to avoid wasting energy.
- Night-time safety mode: between set hours (e.g., 23:00–06:00), reduce trigger intensity and enable soft navigation lights when motion is detected.
- Fade transitions: use 200–800 ms fades for comfortable changes; instant toggles can feel abrupt in small living spaces.
- Manual override with memory: if a manual override is used, give the system a period (e.g., 30 minutes) where automation is softer to avoid fighting the user’s choice.
- Debounce and hysteresis: add a short debounce (100–400 ms) to mechanical sensors and a re-check period to PIRs to avoid flapping and phantom triggers.
Example Automation Ruleset (Pseudocode)
// Simplified rules for a Murphy bed scene
on bedDeployed():
  fadeAmbient(to=25%, duration=400ms)
  setColorTemp(2700K)
  enable(bedsideLights, level=30%)
  enable(floorGuide, level=10%)

on bedStowed():
  fadeAmbient(to=100% daytimeLevel, duration=500ms)
  setColorTemp(daytimeTemp)
  disable(bedsideLights)
  disable(floorGuide)

on motionDetected(zone='bedroom' and timeBetween(23:00,06:00)):
  if bedIsDeployed:
    enable(floorGuide, level=10%)
  else:
    enable(ambient, lowLevel, 30%)
    schedule(off, delay=2min)
Fixtures, Hardware, and Protocols: Selection Guide
Focus on durability, serviceability, and minimal visual bulk. Below are hardware recommendations by category.
- LED strips: 12V/24V high-CRI (>90), 120–240 LEDs/meter for even illumination. Use IP20 for interior; IP65 if near sinks or potentially wet areas.
- Micro recessed fixtures & puck lights: low-profile units that can recess into thin panels for task zones on fold-down surfaces.
- Directional mini-track & adjustable heads: add flexibility for multi-use living/dining/working areas.
- Wireless sensors & controllers: Zigbee, Z-Wave, BLE, Thread/Matter — choose one ecosystem for simpler integration. Matter-compatible hubs are increasingly practical in 2025.
- Battery-backed controllers: useful for off-grid homes or for keeping critical safety lights functional during power events.
- Durable connectors & flex cable: flat flex cables rated for repeated bending, PTFE sleeve or spiral wrap to protect runs across hinges.
Wiring, Power Planning, and Off-Grid Considerations
Power planning is a critical step in tiny home projects. Here are practical strategies and example calculations to inform decisions.
- Prefer low-voltage distribution: run 12V/24V to fixtures to reduce AC wiring complexity and enable smaller driver locations near battery banks.
- Wireless for moving parts: where panels move or fold, use wireless sensors to avoid flexing wires that fatigue over cycles.
-
Battery sizing example:
- Estimate typical lighting load: e.g., ambient + tasks = 60W average during active hours.
- For 4 hours of evening use: 60W x 4h = 240Wh. Add 20% inverter/driver inefficiency => 288Wh.
- With 50% depth-of-discharge recommended for many battery chemistries: required capacity = 576Wh (~0.576 kWh).
- Round up for headroom and include solar charging margin if off-grid.
- Driver selection: use high-efficiency LED drivers and ensure dimmers are compatible with LED load and control protocol.
- Surge and transient protection: include protection for controllers and sensors if on shore power or vulnerable to voltage spikes.
Installation Roadmap: From Concept to Live System
- Audit & sketch: measure, photograph, and map every convertible element and traffic path.
- Define scenes and behaviors: create a simple matrix of furniture states vs desired lighting scenes.
- Select sensors & fixtures: choose components with durability and serviceability in mind.
- Prototype: install sensors and a small selection of fixtures to trial sensor placements and logic before full installation.
- Wiring & mounting: use flexible, protected runs for moving parts; consolidate drivers and controllers where possible.
- Program & tune: implement logic, tune lux levels, color temperatures, fade times, and debounce settings based on live tests.
- Train occupants & label overrides: create a simple quick guide and label manual switches for clarity.
Maintenance, Troubleshooting, and Longevity
- Check mechanical sensor alignment and magnet positions every 6 months; small shifts can cause unreliable triggers.
- Replace batteries in wireless sensors annually, or choose hardwired power where feasible for long-term reliability.
- Update firmware for smart hubs and controllers periodically (at least once per year) to keep compatibility and security patches current.
- Log changes: when making adjustments to scenes or wiring, document them to simplify future troubleshooting.
Budgeting & Cost Tiers (2025 Market Estimates)
Estimate ranges for complete tiny home lightcraft systems, excluding large professional labor variances.
- DIY Basic: $300–$1,000 — LED strips, a few sensors, a local microcontroller or simple smart switches. Minimal scene automation, manual overrides prioritized.
- Smart Mid-range: $1,000–$3,500 — higher-CRI fixtures, multiple sensors, a Zigbee/Matter hub, polished scenes, and some professional assistance.
- High-end / Custom: $3,500–$8,000+ — bespoke fixtures, integrated furniture lighting, professional design, robust off-grid power systems, and enterprise-grade controllers.
Real-World Layout Inspirations and Floor Plan Notes
Here are extended layout concepts and how lighting integrates with convertible elements.
-
Studio Loft with Murphy Bed & Kitchenette:
- Day mode: overhead linear ambient, pendant over kitchen island, under-cabinet strips for prep.
- Night mode: Murphy bed deploys => ambient dims, bedside wall washers engage, floor toe-kicks light the path to bathroom.
- Tip: run LED strips along the underside of the wall bed frame to create a soft backlight when closing the bed, enhancing perceived depth.
-
Two-Person Tiny with Convertible Sofa & Table:
- Use a central track light with adjustable heads to focus on the table when open, and re-angle to illuminate the sofa when closed.
- Integrate seat pressure sensors for occupancy-driven accent lighting only when people are seated.
-
Mobile Tiny on Wheels (Off-Grid):
- Prioritize wireless sensors, battery-backed controllers, and efficient LED drivers. Keep wiring minimal and protected from vibration.
- Design night-mode presets for travel and sleep states with low drain lighting levels.
Materials, Finishes, and Lighting Interaction
Small spaces amplify the visual effect of surfaces. Use lighting to flatter materials and increase perceived space.
- Matte finishes reduce glare and allow accent lighting to create texture. Pair with warm tunable white to emphasize wood grains.
- Glossy surfaces reflect light and can create visually larger spaces but can also produce glare if not balanced with directional control.
- Light-colored ceilings and walls increase perceived ceiling height; uplighting and wall-wash fixtures can make ceilings feel higher.
- Use concealed linear lighting (cove, under-shelf) to blur boundaries between furniture and walls, making convertible elements feel integrated rather than add-on.
Accessibility, Safety, and Human-Centered Considerations
- Ensure navigation lights are always accessible for night-time bathroom trips; avoid punitive dimming during overnight hours.
- Consider users with limited mobility: provide tactile manual controls and voice control fallback for automation.
- Think fire safety: avoid placing LED drivers or power electronics inside combustible furniture cavities without proper ventilation.
- Account for pets: program pet-immune modes for PIRs or use pressure sensors for human-specific occupancy detection.
SEO-Friendly Summary & Actionable Next Steps
Sensor-guided layered lighting is the practical way to make tiny homes truly livable. By mapping furniture states, choosing durable sensors, layering ambient/task/accent lighting, and programming smart yet simple automation, you can transform compact spaces into versatile, comfortable homes. Start small: prototype a single convertible element, iterate based on real use, and expand your system once the logic and hardware prove reliable.
Quick Checklist to Get Started Today
- Sketch the floor plan and mark all convertible furniture and traffic paths.
- Select one control protocol (Zigbee, Z-Wave, Thread/Matter) to simplify ecosystem decisions.
- Prototype one scene (e.g., Murphy bed sleep mode) with two sensors and one controller to learn sensor placements and timing.
- Document wiring runs, sensor IDs, and scene names for future tuning and maintenance.
Further Reading and Tools
- Lux meter apps and physical meters — use these during tuning to hit recommended lux targets.
- Community forums and Matter/Zigbee integration guides for real-world interoperability help.
- Solar calculator tools for off-grid battery sizing — plug in your real loads for accurate estimates.
Crafting harmonious light in small spaces is both an art and a systems challenge. With robust sensors, layered fixtures, and a few thoughtful automation rules, your convertible furniture will feel like it was always meant to exist in the light.
Visit XENTAR for more lighting, decor & furniture curated for modern homes and creative spaces.


Share:
Lighting Landmarks: Sensor-Driven Ambient Anchors to Visually Fix Convertible Furniture in Microhomes
How to Make Modular Furniture Look Custom: Smart Ambient Lighting Blueprints for Tiny Apartments